Using TrackToAct with JavaScript

Pieter van der Westhuizen, a professional freelance web & mobile developer and founder of Coalition Software.
In a previous article I’ve mentioned that you can also send events to TrackToAct via the web. This is accomplished by using the JavaScript snippet you’ll find in the TrackToAct SDK.
In this post I’ll do a short demonstration on how you can track a website visitor’s movement, from where they first visit your site up to where they download and install your application. Because you can also send event information to the TrackToAct cloud based server, you can use it on virtually any platform that supports JavaScript e.g. any website, Office Apps and PhoneGap, to name but a few.
The JavaScript Snippet
You’ll find the snippet in your TrackToAct account under the Event Sensor section.
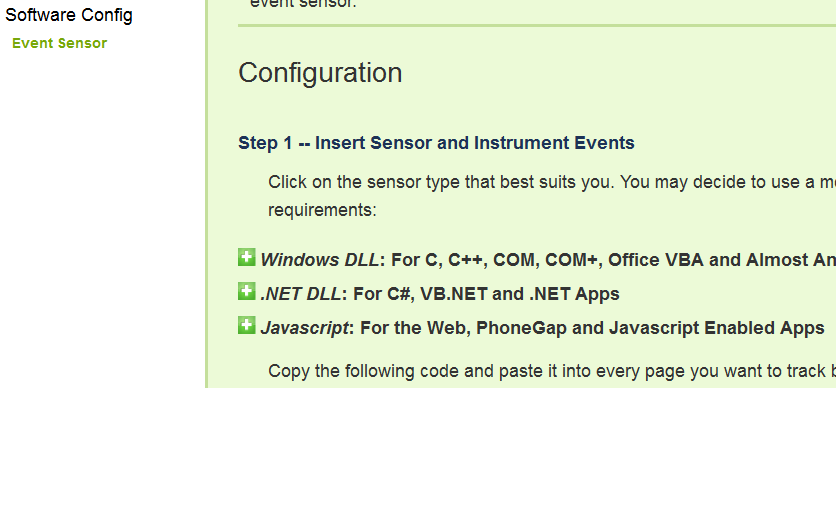
All you need to do is copy the JavaScript and add it inside the tag of the web pages you would like to track e.g.
<!DOCTYPE html>
<html lang=”en” xmlns=”http://www.w3.org/1999/xhtml”>
<head>
    <meta charset=”utf-8″ />
    <title>My Company Website</title>
    <link href=”/favicon.ico” rel=”shortcut icon” type=”image/x-icon” />
    <meta name=”viewport” content=”width=device-width” />
    <link href=”site.css” rel=”stylesheet” />
    <script type=’text/javascript’ language=’javascript’>
         var getSiteObjOverride = function (siteid) { return { “idsite”: “39”, “main_url”: “http://yourusername/MyFirstApp” } }; var JSINCLUDEOBJECT_AUTOSTART = true; var JSINCLUDEOBJECT_APPID = “–YOURAPPID–“; var trackToAct = false; document.write(unescape(“%3Cscript src=’http://tracktoact.com/p1/sdk/jssnippet.js’ type=’text/javascript’%3E%3C/script%3E”));
     </script>
 </head>
 <body>
 </body>
 </html>
Tracking a page event
Once the snippet is in place you can call the trackToAct.logEvent(evt, val) function from the page. In the following example, using the jQuery .ready event handler, I can log a specific users’ visit to my home page:
    <script type="text/javascript">
        $(document).ready(function () {
            trackToAct.logEvent("Home", "Load");
        });
    </script>
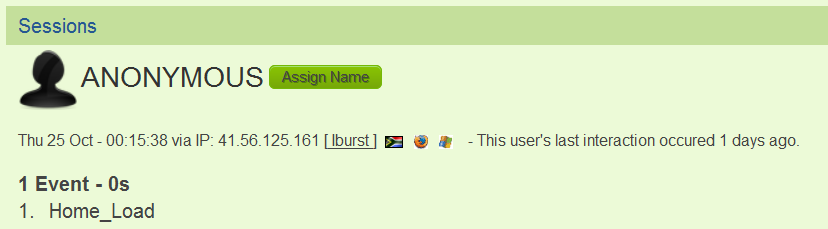
The event will then be displayed in your TrackToAct accounts’ event stream.
I know what you might be thinking…Google analytics does this for me! TrackToAct is not meant to be a replacement for Google Analytics, rather it is designed to track and interact with prospective customers from the point of them visiting your website up to buying and using your product even if they are anonymous.
Tracking user signup
You can also use the TrackToAct JavaScript snippet to track if and when the website visitor registers to download your application. In the following example, I have a simple Html form, where the user enters their e-mail address in order to be able to download the trial version of my application. I’m using jQuery’s .submit event handler to add the tracking code before submitting the form.
<!DOCTYPE html>
<html lang=”en” xmlns=”http://www.w3.org/1999/xhtml”>
<head>
    <meta charset=”utf-8″ />
    <title>My Company Website</title>
    <link href=”/favicon.ico” rel=”shortcut icon” type=”image/x-icon” />
    <meta name=”viewport” content=”width=device-width” />
    <link href=”site.css” rel=”stylesheet” />
    <script src=”jquery-1.7.1.js”></script>
     <script type=’text/javascript’>
         var getSiteObjOverride = function (siteid) { return { “idsite”: “39”, “main_url”: “http://yourusername/MyFirstApp” } }; var JSINCLUDEOBJECT_AUTOSTART = true; var JSINCLUDEOBJECT_APPID = “–YOURAPPID–“; var trackToAct = false; document.write(unescape(“%3Cscript src=’http://tracktoact.com/p1/sdk/jssnippet.js’ type=’text/javascript’%3E%3C/script%3E”));
     </script>
 </head>
 <body>
     <h1>Enter your e-mail address to download the trial.</h1>
     <form id=”trialsignup” action=”HTMLPage1.html”>
         E-mail address:
         <input type=”text” id=”email” />
         <input type=”submit” value=”Download” />
     </form>
     <script type=’text/javascript’>
         $(‘#trialsignup’).submit(function () {
             var emailAddress = $(‘#email’).val();
             trackToAct.logEvent(“TrialSignup”, emailAddress);
         });
     </script>
 </body>
 </html>
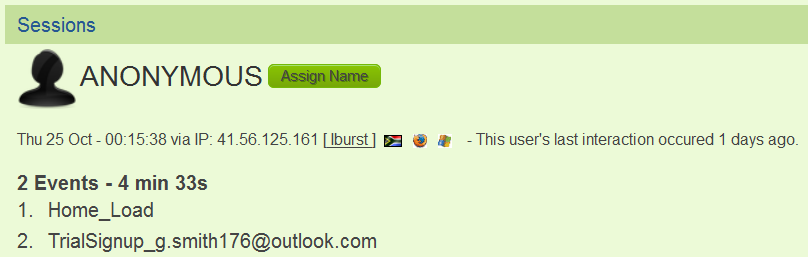
As a result the event will be saved to the TrackToAct event stream as illustrated below.
Tracking application installation
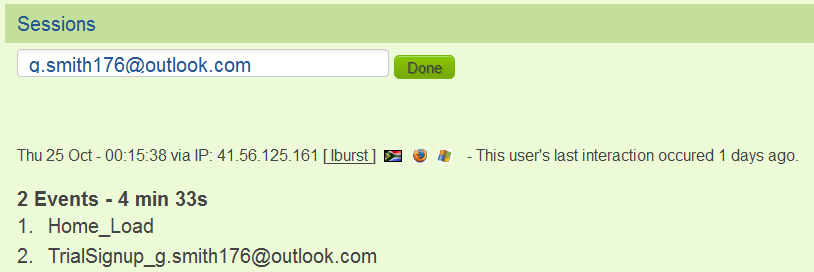
At this point in time, we can see that the visitor visited our home page and completed the trial signup form. At this point we can uniquely identify the visitor by their e-mail address and we can make it easier to identify him/her in future by clicking on the Assign Name button and entering his/her e-mail address.
Let’s assume we’ve already added tracking code to our applications’ setup program and the user has finished installing it as well. Because we’ve instrumented the installation, we can now see if and when the visitor installed our application.
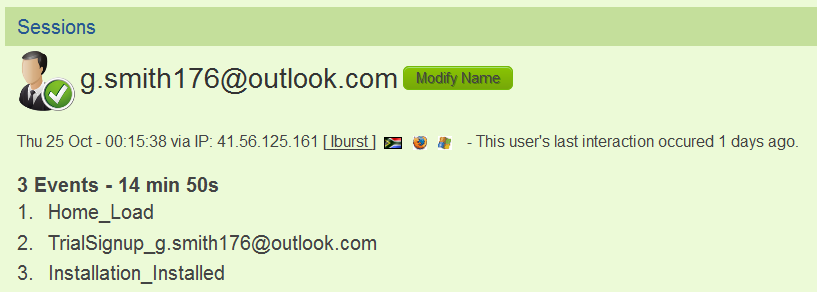
You’ll also notice that because we’ve modified the specific users’ name previously, all their events will be uniquely identifiable.
As I’ve mentioned in a previous post, TrackToAct is focusing on their new in-app messaging feature, that will enable to you send the visitor messages whilst they are learning to use your application, giving you the ability to track potential customers from the time they visit your website up to the point where they install and use your application.
By interacting with trial users of your application, you can keep them engaged and provide support on the fly, which will help you convert them into paying customers, which is something we all strive to accomplish!
Thank you for reading and remember to sign up for a free account with TrackToAct to enable you to also start gathering in-app analytics for your application.
This was a paid-for article brought to you by TrackToAct.