Using AWS Cognito with Xamarin Forms

Pieter van der Westhuizen, a professional freelance web & mobile developer and founder of Coalition Software.
In this post, I'll show you how to quickly and easily set up user authentication for your Xamarin Forms app using Amazon Cognito.
AWS Cognito is a user identity management solution by Amazon. It is a really easy way to add authentication to your application without having to worry about building and managing your own identity/authentication solution.
Xamarin Forms is an open-source cross-platform framework that you can use to create applications for Android, iOS and Windows.
Setting up an AWS Cognito user pool
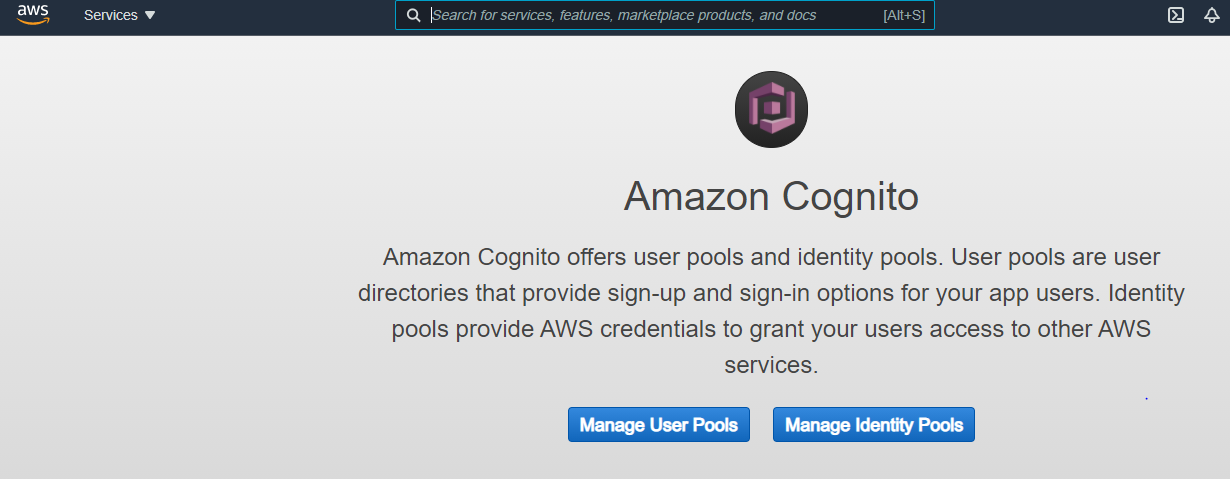
First, we will need to create a user pool in AWS Cognito, which we'll use to create users and an App client. Head over to your AWS Cognito console and click on the "Manage User Pools" button.
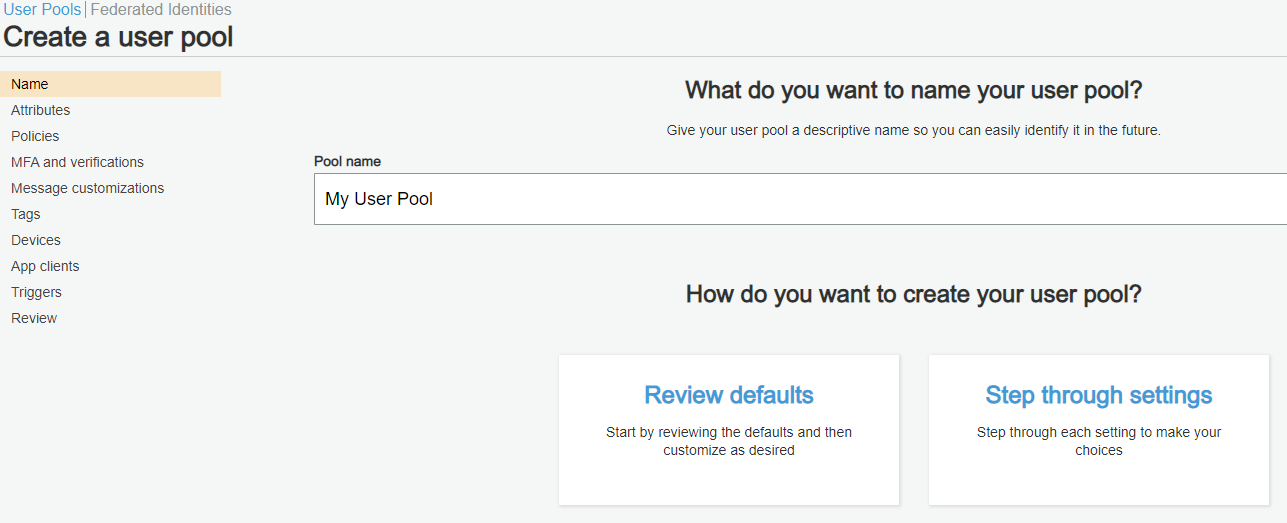
Click the "Create a user pool" button, in the top-right corner of the next page. Next, enter a name for and choose the "Review defaults" option
On the next page, you can review the default options (I'll leave you to experiment with the different settings on your own) and scroll down to App clients.

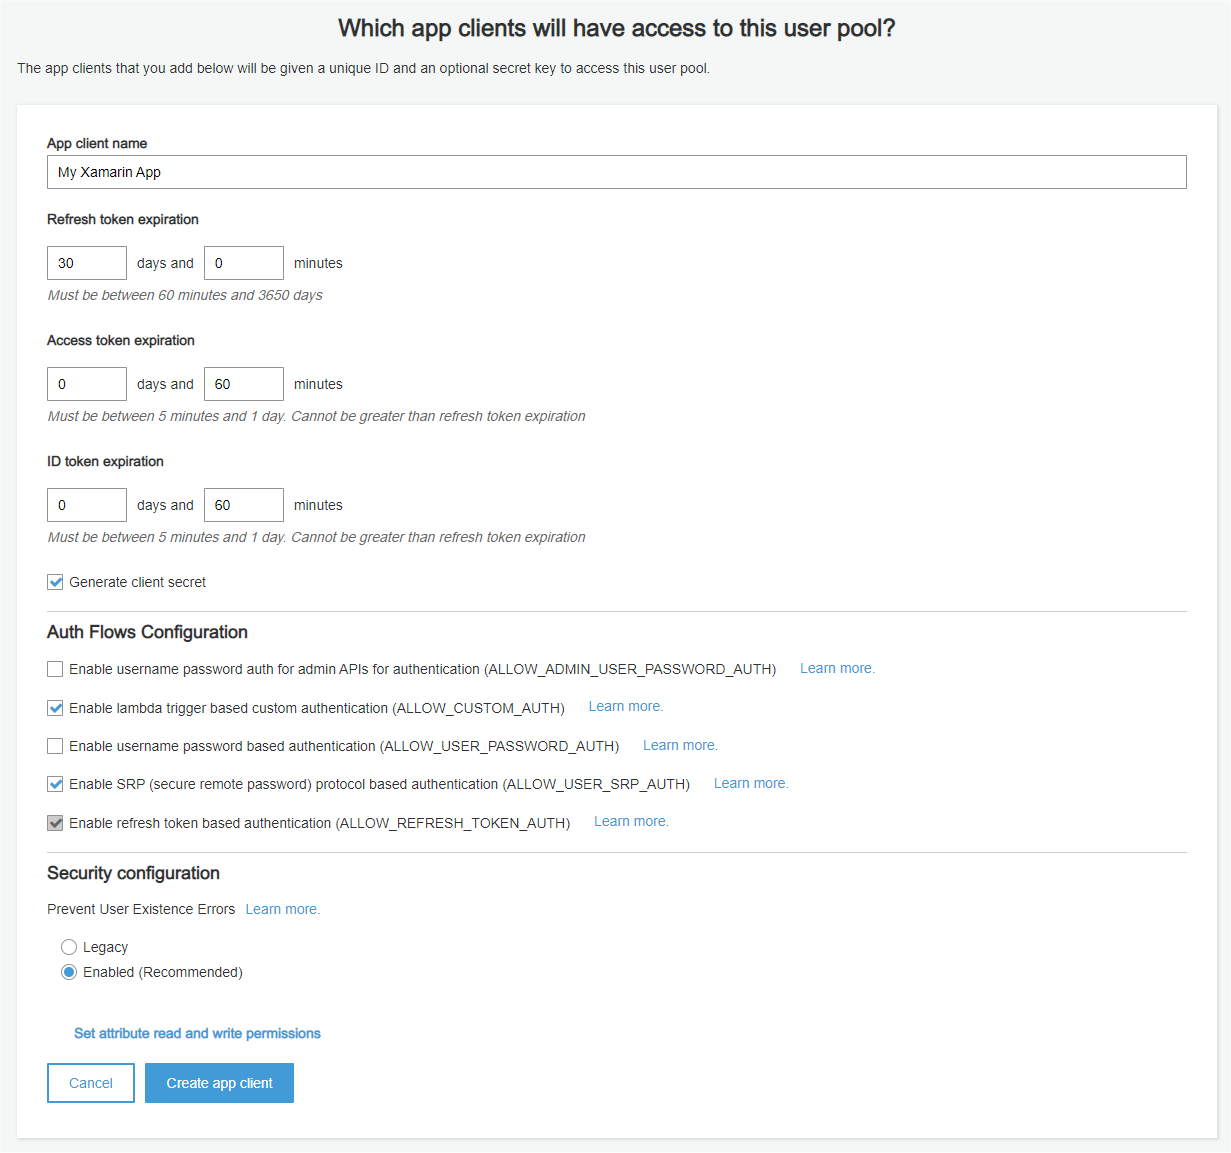
Click on the "Add app client..." link and on the next page, click "Add an app client".
Next, only enter an App client name (We'll use "My Xamarin App" and keep all the options with their default values, scroll down and click "Create app client"
Click the "Return to pool details" and finally click on the "Create pool" button.
Creating a new user
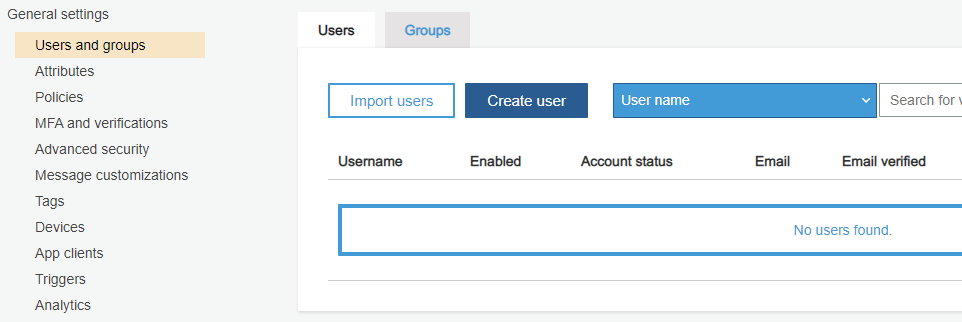
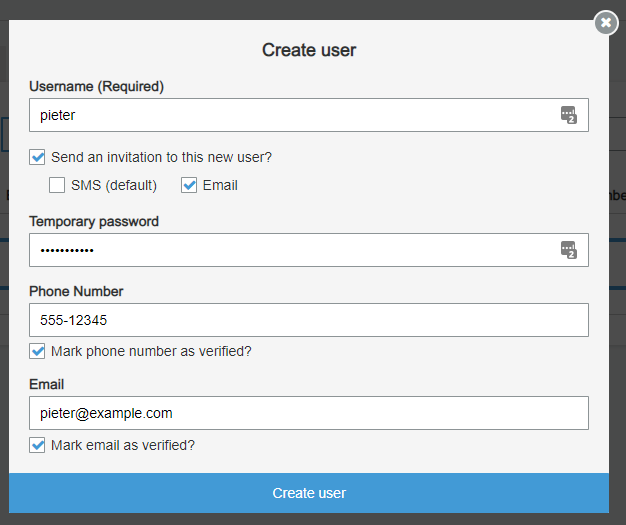
Before we can log in, we first need to create a user. To do this, click on Users and groups under General settings and click the "Create user" button.
 Complete the form, by entering a valid email address (This will be needed shortly) and make sure to tick the Send an invitation to this new user? and Email checkboxes.
With the user created, we need to configure the App client to allow the user to sign in.
Configuring the App client
Click on App client settings under App integration. Check the Cognito User Pool checkbox and complete the Callback URL(s) and Sign out URL(s). These can be any valid web address for now, we'll change them a bit later on for use with our Xamarin app.
Next, check the Implicit grant OAuth flow and select the email, openid and profile OAuth scopes (The scopes won't be super important for this demo, but is when you integrate with your own API, etc.)

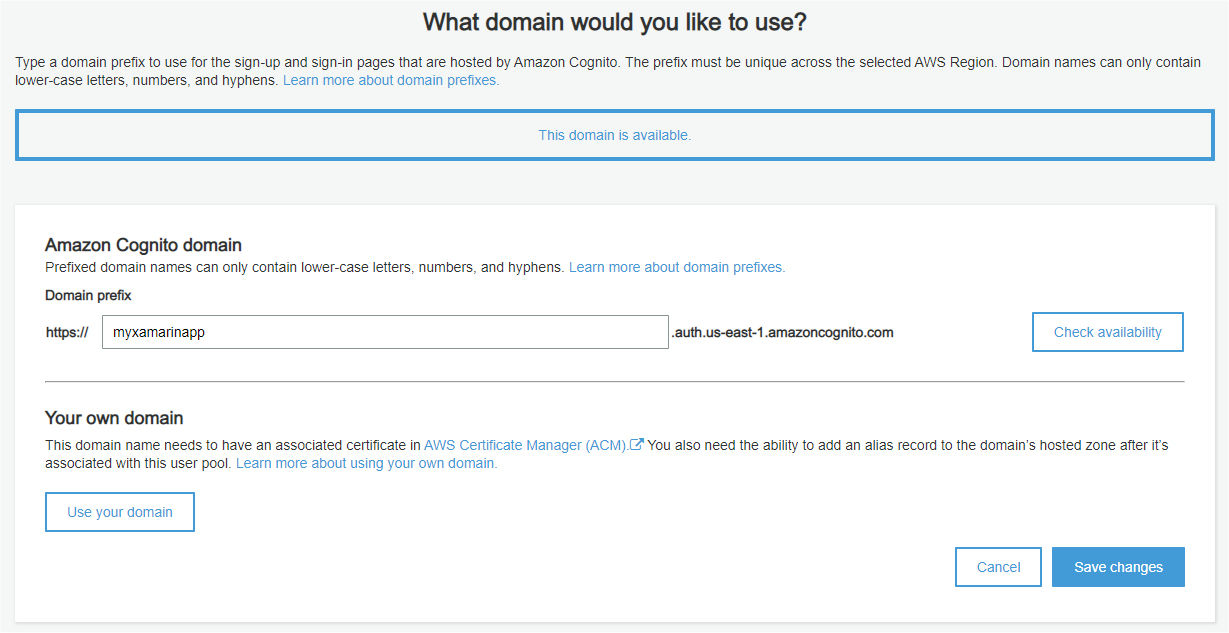
Choose a domain name
With the App client configured, you need to choose a domain name. Click on Doman name under App integration and enter any domain prefix you prefer and check if it is available by clicking on the Check availability button.
If your domain name is available, save the changes, and move onto customizing the UI for the sign-in page.
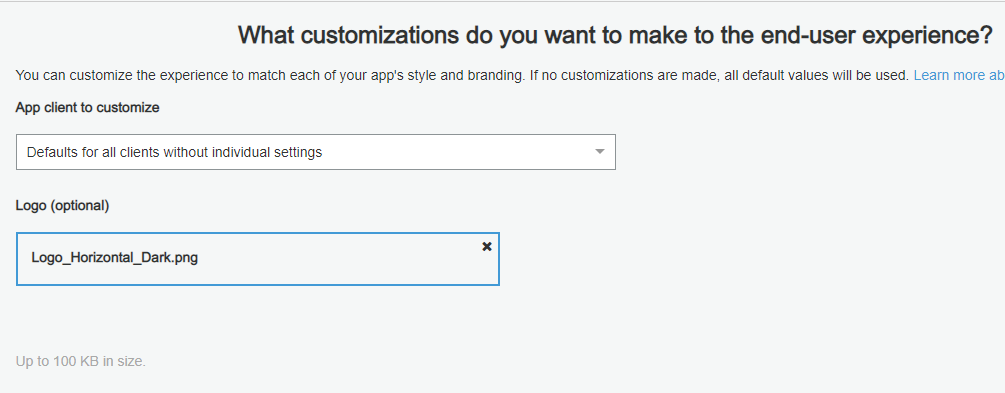
Customizing the sign-in UI
Customizing the UI is an optional step, but it is a nice way to make the UI fit in with your color scheme. Not much need to change with the default style, the only change is to add a custom logo.
Testing the sign-in UI
Save your changes and head back to App client settings where you will notice that we now have the Launch Hosted UI link at the bottom of the page:

Clicking on the Launch Hosted UI link will open the sign-in page in a separate browser tab and you should see something similar to the following:
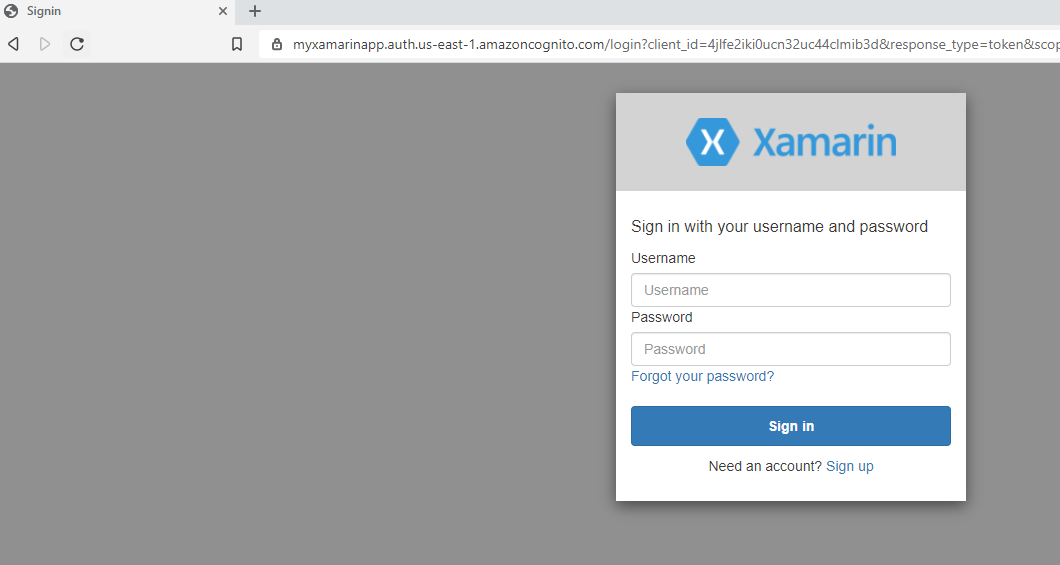
Go ahead and sign in using the credentials for the user we have created earlier. You'll be prompted to specify a new password, remember this password as we'll use it shortly to log in via our Xamarin app.
The Xamarin Forms App
I'm not going to walk you through the process of creating the Xamarin Forms app as I'm assuming you are familiar with the process. The app will not be very complicated and will consist of only one view/page.
Prism Library
I'm a fan of Prism for my Xamarin Forms apps, and will use it for this one, but the code will still work with standard Xamarin Forms or any other MVVM framework. I'm using the Prism Template Pack to create as basic Xamarin.Forms Prism Blank App. This project template will stub out all the necessary files we need for this example.
Xamarin Essentials
First, add the Xamarin.Essentials NuGet Package to your projects. If you're using MVVM (Like we're doing in this example), you'll ideally want to install the Xamarin.Essentials.Interfaces NuGet Package
Android Project Changes
In the Android project, add a new class called WebAuthenticationCallbackActivity and add the following code to it:
using Android.App;
using Android.Content.PM;

namespace XFCognito.Droid
{
    [Activity(NoHistory = true, LaunchMode = LaunchMode.SingleTop)]
    [IntentFilter(new[] {Android.Content.Intent.ActionView},
        Categories = new[] {Android.Content.Intent.CategoryDefault, Android.Content.Intent.CategoryBrowsable},
        DataScheme = "myxfcognitoapp")]
    public class WebAuthenticationCallbackActivity
        : Xamarin.Essentials.WebAuthenticatorCallbackActivity
    {

    }
}
Make note of the DataScheme value, myxfcognitoapp, we are going to need this later.
AndroidManifest.xml If you're targeting Android 11, you'll need to add the following to AndroidManifest.xml:
<queries>
  <intent>
    <action android:name="android.support.customtabs.action.CustomTabsService" />
  </intent>
</queries>
iOS Project Changes
Info.plist In your iOS project add the following to Info.plist:
<key>CFBundleURLTypes</key>
<array>
  <dict>
    <key>CFBundleURLName</key>
    <string>myxfcognitoapp</string>
    <key>CFBundleURLSchemes</key>
    <array>
      <string>myxfcognitoapp</string>
    </array>
    <key>CFBundleTypeRole</key>
    <string>Editor</string>
  </dict>
</array>
Note that we're using the same value(myxfcognitoapp), that we've used for the DataScheme value in Android for CFBundleURLName and CFBundleURLSchemes.
AppDelegate.cs Override the OpenUrl and ContinueUserActivity methods in the AppDelegate class with the following:
public override bool OpenUrl(UIApplication app, NSUrl url, NSDictionary options)
{
    if (Xamarin.Essentials.Platform.OpenUrl(app, url, options))
        return true;

    return base.OpenUrl(app, url, options);
}

public override bool ContinueUserActivity(UIApplication application, NSUserActivity userActivity,
    UIApplicationRestorationHandler completionHandler)
{
    if (Xamarin.Essentials.Platform.ContinueUserActivity(application, userActivity, completionHandler))
        return true;

    return base.ContinueUserActivity(application, userActivity, completionHandler);
}
The Xamarin.Essentials documentation is an excellent resource if you need more information on how the Web Authenticator works. I can highly recommend it.
Shared Project Changes
App.xaml.cs Open the App.xaml.cs file and change the RegisterTypes method to the following:
protected override void RegisterTypes(IContainerRegistry containerRegistry)
{
    containerRegistry.RegisterSingleton<IWebAuthenticator, WebAuthenticatorImplementation>();

    containerRegistry.RegisterForNavigation<NavigationPage>();
    containerRegistry.RegisterForNavigation<MainPage, MainPageViewModel>();
}
All we're doing is registering the WebAuthenticator so that we can inject it into our ViewModel and setting up the Prism navigation.
MainPageViewModel.cs Next, open the MainPageViewModel.cs class in the ViewModels folder. Change the code to the following:
using Prism.Commands;
using Prism.Navigation;
using System;
using System.Threading.Tasks;
using Xamarin.Essentials.Interfaces;

namespace XFCognito.ViewModels
{
    public class MainPageViewModel : ViewModelBase
    {
        private readonly IWebAuthenticator _webAuthenticator;

        private string _accessToken;
        public string AccessToken
        {
            get => _accessToken;
            set => SetProperty(ref _accessToken, value);
        }

        private DelegateCommand _loginCommand;
        public DelegateCommand LoginCommand => _loginCommand ?? (_loginCommand = new DelegateCommand(ExecuteLoginCommand));

        public MainPageViewModel(INavigationService navigationService, IWebAuthenticator webAuthenticator) : base(navigationService)
        {
            _webAuthenticator = webAuthenticator;
            Title = "AWS Cognito & Xamarin Forms";
        }

        async void ExecuteLoginCommand()
        {
            try
            {
                var results = await _webAuthenticator.AuthenticateAsync(
                    new Uri("https://myxamarinapp.auth.us-east-1.amazoncognito.com/login?client_id=4jlfe2iki0ucn32uc44clmib3d&response_type=token&scope=email+openid+profile&redirect_uri=myxfcognitoapp://"),
                    new Uri("myxfcognitoapp://"));

                AccessToken = results?.AccessToken;
            }
            catch (TaskCanceledException  e)
            {
                AccessToken = "You've cancelled.";
            }
        }
    }

}
In the code above, we've created a property that will hold the AccessToken we get back from AWS Cognito, we've also added a LoginCommand that calls the Xamarin Essentials WebAuthenticator's AuthenticateAsync method.
The AuthenticateAsync method takes two parameters, the first is the URL to the AWS Hosted UI, you can get this by copying the URL that opens when clicking the Launch Hosted UI link in AWS Cognito's App client settings. The second parameter is the DataScheme value (myxfcognitoapp) that we've used previously with a colon and two forward slashes appended.
Final Changes
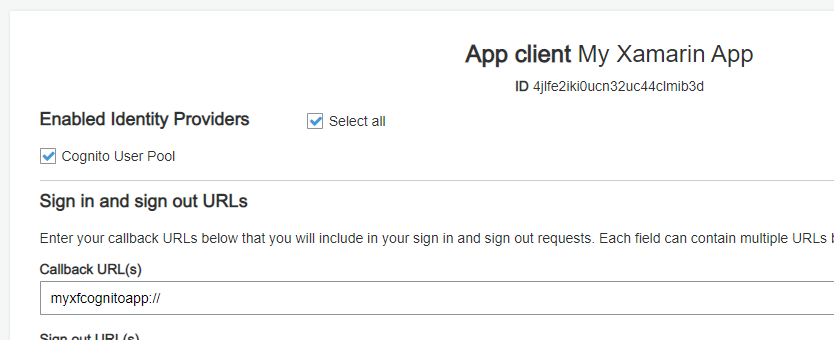
Go back to the App client settings in AWS Cognito and change the Callback URL(s) to the DataScheme value, in the following format:
myxfcognitoapp://
The app in action
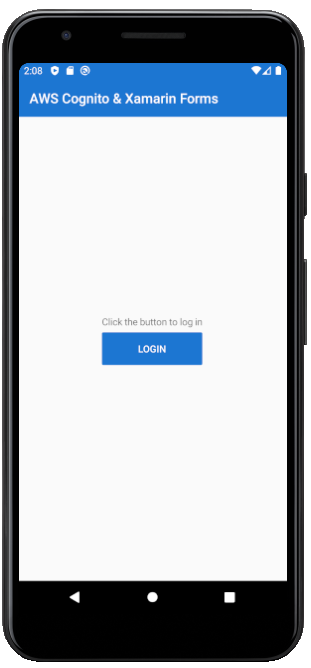
When running the app on Android, the first view will be the MainPage.
Tapping on the Login button, you'll be taken to the AWS Cognito Hosted Login page.

After entering your credentials and signing in, the app will navigate back to the MainPage and your AccesToken will be displayed.
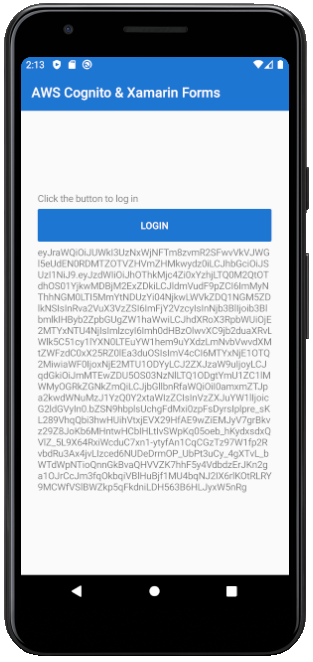
This AccessToken can now be used to make any authenticated API calls you need.
The experience on iOS is similar: {% youtube F1rGnHGbb4I %}
Thank you for reading. Until next time, keep coding!
Full app source code is available on GitHub: https://github.com/Pietervdw/xamarinforms-awscognito