Rewriting Windows forms applications for the Web Part 1

Pieter van der Westhuizen, a professional freelance web & mobile developer and founder of Coalition Software.
A very long time ago, June 2007 to be more precise, I rambled on about a new library system I was writing. Well, that application has been written and is still running at a client. In the last 4+ years since I first wrote the library system, things have changed considerably for Windows developers. A reality all Winforms developers eventually have to acknowledge is that the world we know so well is fast disappearing.
Writing browser-based applications have not only become the norm but is what clients want. So, I’ve decided that I will re-write my Alexandria Library system for the web and will walk you through the process while I’m doing it.
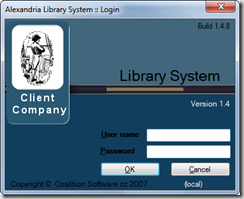
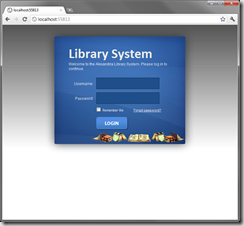
First, let’s have a look at what the system looks like currently. When the user starts the application they are presented with a standard login form, where they enter their username and password:
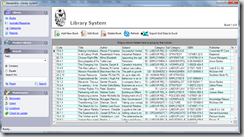
After the user has successfully logged in they are presented with the main form, which show a number of options.
Our first focus would be to re-create the main layout for the web. After that we’ll look at implementing a simple security modal and creating a logon form.
I’ll be using ASP.Net MVC 3 and C#. To get started I’ll create a new ASP.Net MVC 3 Web Application in Visual Studio 2010.
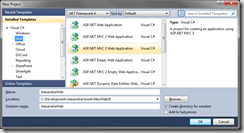
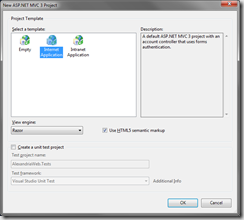
Choose Internet Application and Razor as the View engine.
I’m a fan of the way Rob Conery structures his project layout in his ASP.Net MVC 3 series on TekPub, so we’ll first fix our project layout. Create a new folder under the root folder called Public. In this folder I created 3 subfolders named:
- images
- javascripts
- stylesheets
I’ll delete the Content and Scripts folders. You can move the scripts in the Scripts folder to Public/javascripts if you like, I prefer adding them as needed.
Next, I’ll create the Index page, this page is what the users will see as soon as they open the website. For now it will only contain a login form.
Another tip I took from Rob, is creating my own Html helper. Create a new folder called App_Code. In this folder create a new file called Assets.cshtml. Remove any code from this file and add the following:
@helper CSS(string cssFile) { }
This helper will make it easier and quicker to add css style sheets to our pages. Next, we need some graphical assets for the site. I needed a nicely designed login form and found it at www.psdgraphics.com.
In the download from PSDGraphics, you’ll find all the necessary files to make the layout work. Add the following files to the images folder:
- login-box-backg.png
- login-btn.png
Next, add a new stylesheet called style.css to the stylesheets folder and add the following css to it:
#login-box { width:333px; height: 352px; padding: 58px 76px 0 76px; color: #ebebeb; font: 12px Arial, Helvetica, sans-serif; background: url(../images/login-box-backg.png) no-repeat left top; margin-left:auto; margin-right:auto; }
#login-box img { border:none; }
#login-box h2 { padding:0; margin:0; color: #ebebeb; font: bold 44px "Calibri", Arial; }
#login-box-name { float: left; display:inline; width:80px; text-align: right; padding: 14px 10px 0 0; margin:0 0 7px 0; }
#login-box-field { float: left; display:inline; width:230px; margin:0; margin:0 0 7px 0; }
.form-login { width: 205px; padding: 10px 4px 6px 3px; border: 1px solid #0d2c52; background-color:#1e4f8a; font-size: 16px; color: #ebebeb; }
.login-box-options { clear:both; padding-left:87px; font-size: 11px; }
.login-box-options a { color: #ebebeb; font-size: 11px; }
I’ve centered the login box, using margin-left and margin-right. You can read more about centering things with CSS here. Added a not too bad looking background from http://www.grsites.com. Finally open the Index.cshtml file under the Home folder and change its markup to the following:
@{ ViewBag.Title = "Alexandria :: Library System"; Layout = null; }
body
{
background: url(../public/images/fadestrip.png) ;
background-repeat: repeat-x;
}
@Assets.CSS("style.css")
@using (Html.BeginForm())
{
Remember Me Forgot password?
}
Ok, so let us review the Html. You’ll notice I used the Assets.CSS helper to add the stylesheet. I’ve surrounded the html with a Html.BeginForm and changed the Login button to an input. When the user clicks on the Login button it will cause a form submit or HttpPost. To cater for this open the HomeController.cs file and add a new ActionResult:
[HttpPost] public ActionResult Index(string username, string password) { if (username.Equals("lib") && password.Equals("lemmein")) { return RedirectToAction("Index", "Library"); } return View(); }
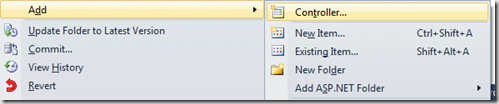
The username and password is hardcoded for now, we’ll add the authentication at a later stage. If the user enters the correct username and password they will be redirected to the Index action on the Library controller. At the stage we don’t have a Library controller so we’ll go ahead and add one. Right-click on the Controllers folder and select Add > Controller from the context menu.
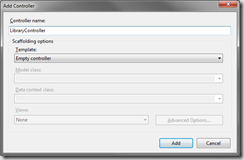
Change the Controller name to LibraryController and leave the template as Empty controller.
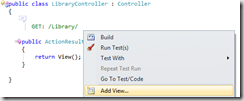
Visual Studio will automatically add a new LibraryController.cs file to the Controllers folder and add a default Index action to it. Next, we need to create a view to go along with the Index action, to do this right-click in the Index action and select Add View…
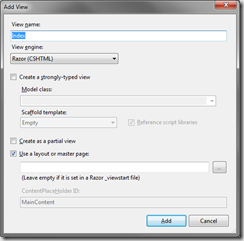
A form will pop up requesting some detail about the view, leave the default values and click Add.
The view will open and you will notice a new Index.cshtml file in the View/Library folder. If all went well build and run your project and you should see a site similar to the image:
If you log in, you will be taken to the Library’s Index view:
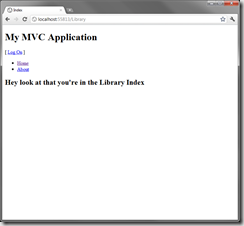
You’ll notice it looks a bit weird and has a bunch of the empty MVC project template stuff. We’ll fix this in the next part of the series.
If you have any comments or questions don’t be afraid to leave a comment. Thanks for reading. Until next time, keep coding!
Resources used in this post:
- Background Textures – [http://www.grsites.com/](http://www.grsites.com/ "http://www.grsites.com/")
- Clipart images – [http://www.1clipart.com](http://www.1clipart.com "http://www.1clipart.com")
- Login form – www.psdgraphics.com/