How to publish a NuGet Package to GitHub Packages

Pieter van der Westhuizen, a professional freelance web & mobile developer and founder of Coalition Software.
Overview
At Coalition Software we have a number of in-house libraries for a variety of tasks such as sending email, managing multi-tenant applications and utilities for working with Cosmos Db. Previously, to share these types of utility projects, you had to either include the .DLL in the repository or reference it by adding the project to your Visual Studio solution. This worked, but it does add some administrative overhead.
With GitHub packages, we’re able to publish our in-house libraries as NuGet packages and easily use in our projects.
In this quick guide, I’ll show you how to publish your own libraries as NuGet Packages to GitHub Packages.
Create an Access Token
Before you can push packages to GitHub you first need to create a Personal access token.
- Navigate to [https://github.com/](https://github.com/ "https://github.com/") and log in with your account.
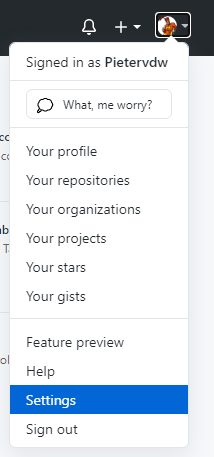
- Click on your profile image and select Settings
- On your Profile settings page, click on Developer settings
- Click on Personal access tokens
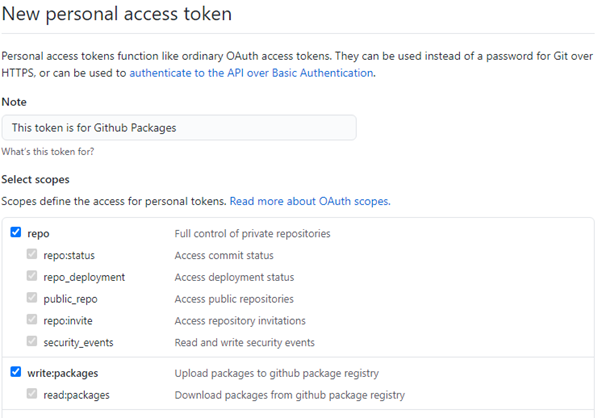
- Click the Generate new token button.
- Add a note about what the token is for and make sure to tick the read:packages scope.
With the token created, we can now add a new NuGet Source.
Adding a new NuGet Source
If you want to push NuGet packages to GitHub Packages, you must create a source using the NuGet CLI. To do this, you’ll need to execute the following command in your Command Prompt:
nuget source Add -Name “[source-name]” -Source “https://nuget.pkg.github.com/[your-github-organization]/index.json” –UserName [your-github-username] –Password [your-github-access-token]
```console
Let’s take a closer look at the command parameters (marked in red) and what they mean:
* **Name :** The Name parameter is what the source should be called, it can be anything. Ideally, you can give it a name like “Our GitHub Packages”
* **Source :** The Source parameter should contain the url to your GitHub organizations’ NuGet package index.json. You can use the URL in the example and substitute your organization name.
* **UserName :** This should be the username of the GitHub account you’ve created to generate the personal access token above.
* **Password :** This is the personal access token that you created earlier.
If everything went according to plan, you should see a new Package source in Visual Studio. To check this, go to _Tools > Options… > NuGet Package Manager > Package Sources

Set a NuGet ApiKey
==================
Although not necessary, it does make thing a bit smoother if we add an API Key for the newly added NuGet Source’s URL. To do this, execute the following command:
```console
nuget setApiKey [personal-access-token] -Source [https://nuget.pkg.github.com/[your-github-organization]/index.json](https://nuget.pkg.github.com/[your-github-organization]/index.json)
Publish to GitHub Packages
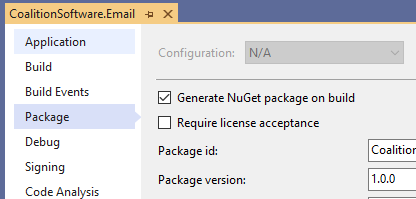
To create a NuGet package for your project, you can use the nuget pack command or you can enable the “Generate NuGet package on build” option in your project properties.
After the NuGet package has been generated. You can run the following command to push it to GitHub Packages:
nuget push “E:Githubcoalition-softwareemailsrcbinReleaseCoalitionSoftware.Email.1.0.0.nupkg” -Source “Our Packages”
The first parameter should be the path to the .nupkg file that was generated by Visual Studio or the nuget pack command.
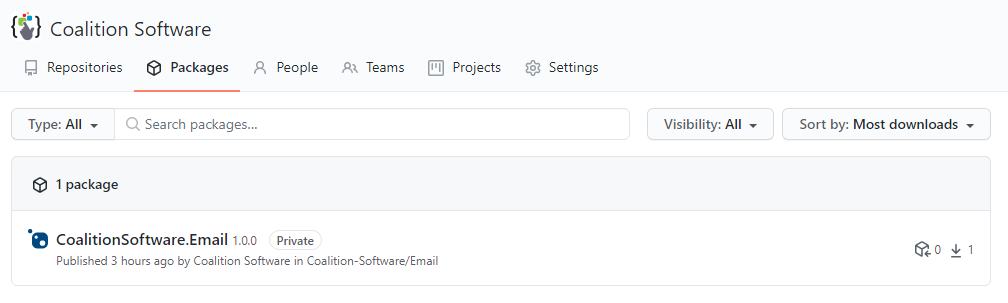
If everything worked, you should see your new package in GitHub:
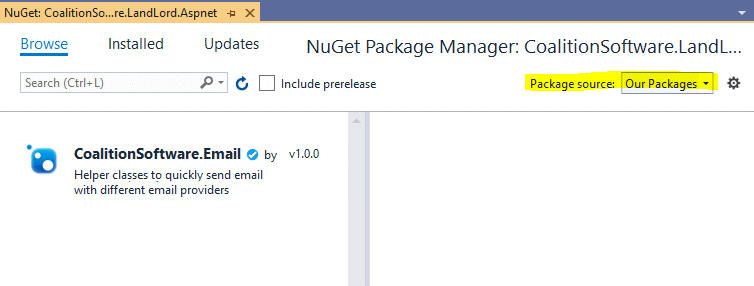
Using your GitHub Package in Visual Studio
Finally, if we want to add our GitHub Package as a reference to a project in Visual Studio, we simply need to change the Package source dropdown to our newly added NuGet source:
Thank you for reading. Until next time, keep coding!