Gathering install/uninstall analytics with TrackToAct

Pieter van der Westhuizen, a professional freelance web & mobile developer and founder of Coalition Software.
So you’ve built your product, set up your website and are allowing people to try your application by downloading a free trial. You can easily track the number of visitors to your website and you are able to generate some pretty insightful reports on them as well by using Google Analytics.
You can see how many people are downloading your application, but how do you know if the user that downloaded your application is actually installing and using it? It would also be great to gain some insight to see if once users installed the trial version of your application whether they uninstall it and how quickly since they’ve installed it, it was uninstalled.
Enter TrackToAct… By using their API, I can add custom actions to my setup project and track how and when users install and uninstall my application. In this article I’ll show you how you too can use this functionality to gain valuable insight into your users’ experiences.
Adding a custom action
We’ll assume we’ve already created a Windows forms application project and added a new setup project as well. In order to track the installs and uninstalls we need to add our own custom action.
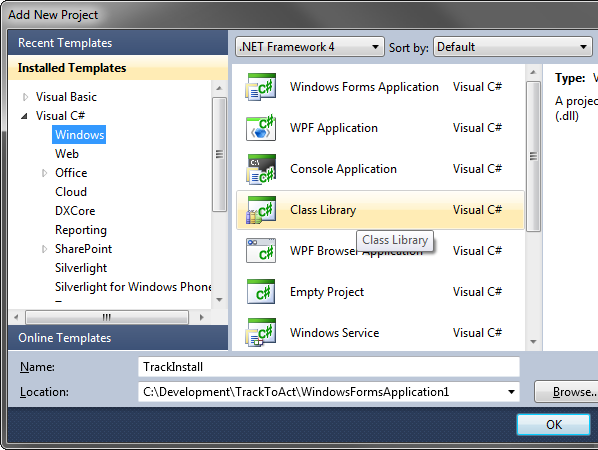
Add a new C# Class Library Project to your Visual Studio solution.
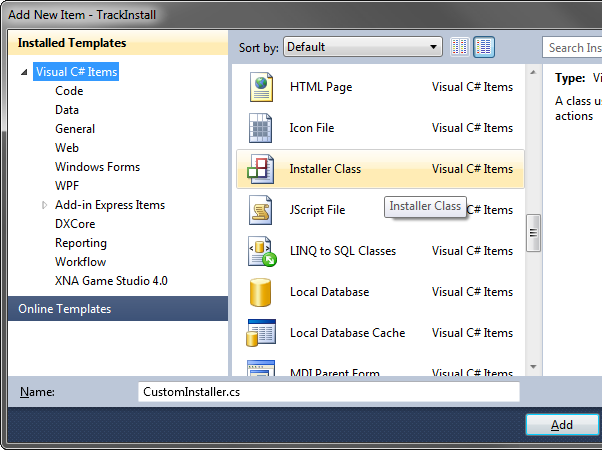
This will create a new class library project. Next, add a new Installer Class to the class library project:
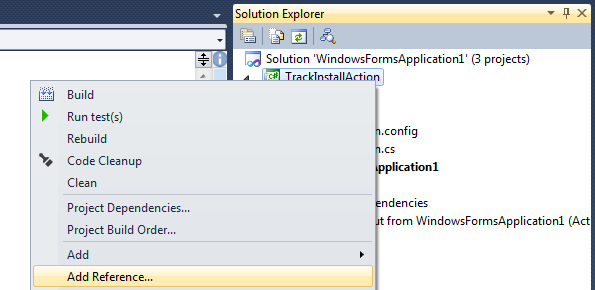
Before we can add tracking code, we need to add the tracktoact.dll as a reference to our project.
You can find the .Net assemblies for TrackToAct, when you log into your account and click on Event Sensor. From there you have a choice to download or use one of the following:
Windows DLL, can be used in C, C++ and Office VBA;
.Net DLL, for use with all .Net applications;
Javascript, can be used for all web, PhoneGap and even Office 2013 Apps; and
VBA Snippet, a very neat and easy way to embed TrackToAct in your VBA apps or MS Office documents.
Once you’ve added the .Net dll to your project, add the following code to the Custom Installer class:
public override void Install(IDictionary stateSaver)
{
  TrackToAct.Service.T2ASdk_InvokeRemoteService("--YOURAPPID—", "Installation","Installed");
  base.Install(stateSaver);
}

public override void Uninstall(IDictionary savedState)
{
  TrackToAct.Service.T2ASdk_InvokeRemoteService("--YOURAPPID—",

   "Installation","Uninstalled");
  base.Uninstall(savedState);
}
Adding the custom action to your setup package
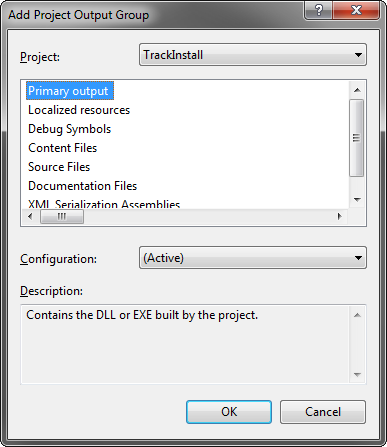
Right-click on the setup project and select Project Output… from the Add menu.
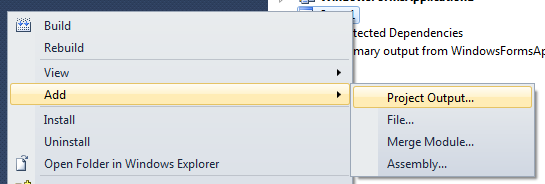
Select the Primary output of the class library we’ve added to the project earlier.
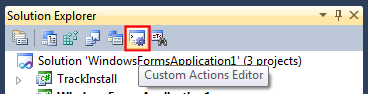
Next, click on the Custom Actions Editor button in the Solution Explorer toolbar.
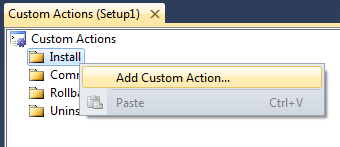
Right-click on the Install node and select Add Custom Action…
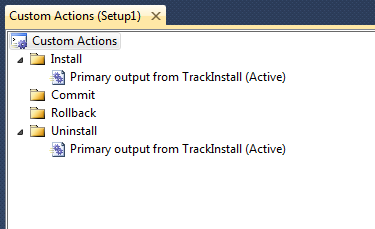
Select the Primary output for the class library we’ve added earlier and click OK.

Do exactly the same for the Uninstall node. The Custom Actions windows should resemble the following once you are done:
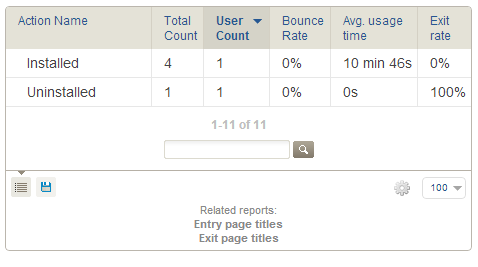
You are now ready to build your setup project and deploy it to your users. As they install and uninstall your application, the tracking code will save the usage data to TrackToAct and you would be able to gain insights into the number of users that installed and uninstalled your application.
By using this approach you can implement steps to determine why people are uninstalling your application or why your application is downloaded but never installed. Perhaps your installation is too complex or intimidating for the user, maybe after they have installed the application it appears not to be working or is not working at all..
Your installation is the first impression the user gets and it is very important that it is a painless and easy experience.
Thank you for reading! Until next time, be sure to visit the TrackToAct website and see how they can help you convert more downloads into sales, by signing up for a free account.
This was a paid-for article brought to you by TrackToAct.