Creating a movie app using Xamarin.Forms and Prism – Part 1

Pieter van der Westhuizen, a professional freelance web & mobile developer and founder of Coalition Software.
Today, we’ll start with setting up a new project using Xamarin.Forms and the Prism Library. Our app will be a simple movie database that lists and displays information about movies.
We’ll be using the The Movie Db API, which is a free service. Read more at [https://www.themoviedb.org/documentation/api](https://www.themoviedb.org/documentation/api "https://www.themoviedb.org/documentation/api")
I wont be delving too deep into Xamarin.Forms and Prism, instead I’ll rather focus on showing you how to use the tools at your disposal. Needless to say, if you want to learn more about Xamarin, head over to Xamarin University, they have excellent content and the instructors know their stuff. If you need more information about Prism, it is all open source and the documentation helps you get started quickly. Check it out at [http://prismlibrary.github.io/](http://prismlibrary.github.io/ "http://prismlibrary.github.io/")
Without further ado, lets get started!
File, New, Project
Our first step is to create a new project in Visual Studio. Fire up Visual Studio 2017 and select File> New > Project. In the New Project dialog window, select Prism Blank App (Xamarin.Forms). You’ll find the the project template under Visual C# > Prism.
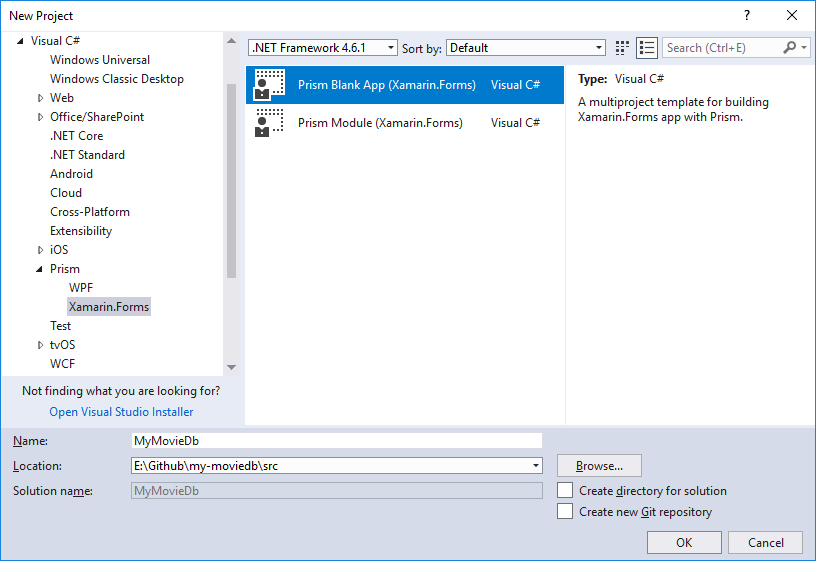
Not seeing the template in Visual Studio? You need to install the
Prism Template Pack.
Click OK and select the platform your app will support, Android and iOS for this example. You can also select your preferred DI container. I’ve read some good things about Dryloc, so for this example we’ll use it.
Next, click Create Project.
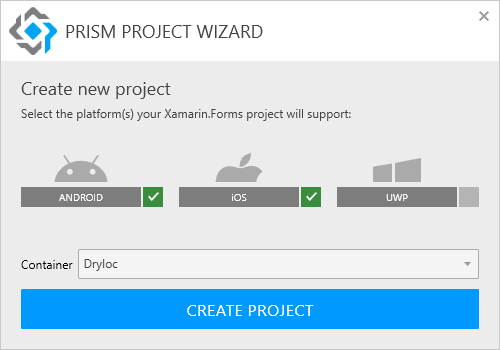
Which container should I use? Honestly, it is down to personal preference. Prism provides an abstraction over the container, which means it isn’t tied to any specific implementation. You’ll see what I mean as we continue with the project.
You can read more about in the Prism docs.
The project wizard will generate the initial project layout for you. When finished, you should see a solution structure similar to the following:
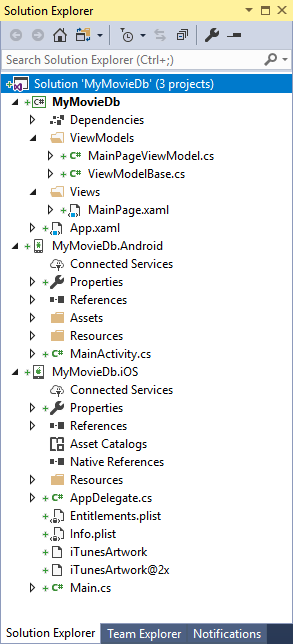
Shared Project structure
We’ll focus mostly on the shared project (MyMovieDb) in this post. I prefer to follow the layout as detailed in Gill Cleeren’s Building an MVVM-based Architecture for Xamarin Mobile Apps Pluralsight course, which I can recommend that you watch.
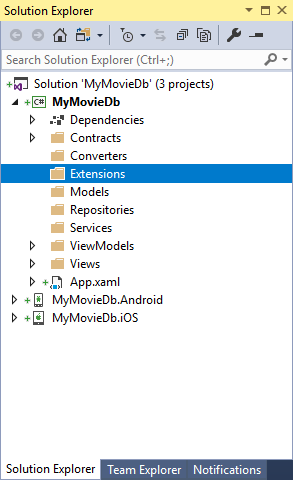
First, let’s go ahead and add a few folders to help structure our code:
- Add a new folder called Contracts
- Add two subfolders to the Contracts folder called Repositories and Services. These two folders will contain the Interface declarations for our repository and services classes.
- Create another two folders in the root of the MyMovieDb project, called Repositories and Services. The folders will contain the implementations of the repository and services classes.
- And another called Models. This folder will contain any model classes.
- Almost done. Add another folder for any custom value converters called Converters.
- Lastly, add a folder called Extensions, which will contain any extension method classes.
The final layout of our shared project, should resemble something like the following:
Installing required NuGet packages
TMDbLib
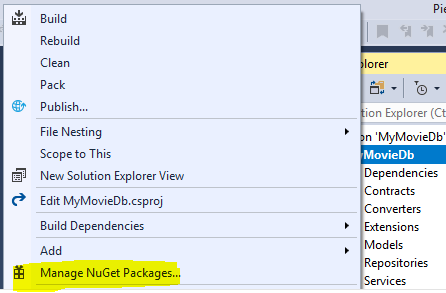
We’ll need a way to retrieve data from The Movie DB API. Luckily, a .Net wrapper library, for said API, has already been written and is available as a NuGet package. To install it, right-click on the shared code project (MyMovieDb) and select Manage Nuget Packages… from the context-menu.
Click on Browse and enter TMDbLib in the Search box. You should see the TMDbLib by LordMike in the list of available packages. Click on the Install button on the right to install the library into your shared project.

With the wrapper library installed, we can get to work adding classes to make retrieving data easier.
AutoMapper
Next, we’ll need AutoMapper to take care of some of the heavy lifting in mapping objects. To install it, follow the steps detailed above, but this time search for the AutoMapper library:

To the code!
With the necessary references in place, let’s get down to writing some code!
Right click on the Models folder, and add a new class called
Genre.Right click on the Services subfolder in the Contracts folder, and add a new interface called
IMovieService.Next, right-click on the Repositories subfolder in the Contracts folder, and create a new interface called
IMovieRepository.
After we’ve created the interfaces, we can now start writing the implementation for each.
- Add a new class, called
MovieRepositoryto the Repositories folder and make sure that it implements theIMovieRepositoryinterface. - Add a using to the TMDbLib library to your class:
using TMDbLib.Client; - Add a new local TMDbClient variable called
_clientto theMovieRepositoryclass. Be sure to pass in your The Movie DB API Key as part
of it’s constructor arguments :TMDbClient _client = new TMDbClient("---YOUR-API-KEY---"); - Add the following code to the
GetGenres()method:
- Add a new class, called
The full code listing for the MovieRepository class should look similar to the following:
- Next, in the Services folder. Add a new class called
MovieService. - The
MovieServiceclass should implement theIMovieServiceinterface - Add a constructor for the
MovieServiceclass, that accept anIMovieServiceparameter - Add a local variable of type
IMovieServicecalled,_movieRepoto the class - Set the
_movieRepovariable equal to the constructor parameter - Finally, call the
_movieRepo.GetGenres()method from theGetGenres()method of theMovieServiceclass.
The full code listing for the MovieService class follows:
Last steps
You might’ve notice we use a Mapper object to map the TmDbLib Genre object to our own Genre object (in the Models folder). This is done using the AutoMapper libary, and in order to make this work, we first need to perform the following steps:
- Open the App.xaml file’s code-behind, App.xaml.cs
Add a new private method called
InitAutoMapper()to the class. This method will create the mapping for the objects we need:Next, call the
InitAutoMapper()method inside theOnInitialized()method :InitAutoMapper();
And with that, we’re at the end of this post. In the next post, we’ll get down to business and start invoking the web service calls and display the data on the UI.
Thank you for reading! This one is for you Rodg.
Links for this post:
- GitHub repo for this blog series
- Prism Library
- The Movie Db API Developer Docs
- TMDBLib on GitHub
- AutoMapper
Before you go, the code presented in this blog post is just one approach of many. If you see a mistake or know of a better way to accomplish the tasks detailed here, please feel free to share it, in the comments section below, in a respectful and clear way. Any comments and suggestions are always appreciated.