Adding in-app analytics to an Outlook Add-in with TrackToAct
Pieter van der Westhuizen, a professional freelance web & mobile developer and founder of Coalition Software.
SyncAce is an add-in I’ve developed to enable users to access the functionality of Highrise from within Outlook. Version 2 of SyncAce is still in development, but I have some pretty big plans for this version. You’ll be able to maintain all you Highrise data straight from Outlook, which includes your Highrise contacts, tasks, deals, notes and cases.
It would be very interesting to see which feature of SyncAce users utilise the most. Do they use SyncAce to primarily synchronize their Highrise data with Outlook or do they use it for much more, i.e. as a complete Outlook client for Highrise? To answer this and other questions, I could create a short questionnaire and ask registered users to complete is and draw my conclusions form that. But this approach is time consuming and not all users would have the time or would necessary want to complete such a questionnaire.
Luckily TrackToAct can help me out. By adding TrackToAct to my project I can easily determine which feature users like the most which are displayed in a graphical and easy to understand manner. Think of it as your own Customer Experience Improvement Program.
Just as with the Microsoft Customer Experience Improvement Program, you should always give your users the option to either opt-in or out of collecting their usage data. Even though the data you gather is anonymous, users’ right to privacy should always take a front row seat.
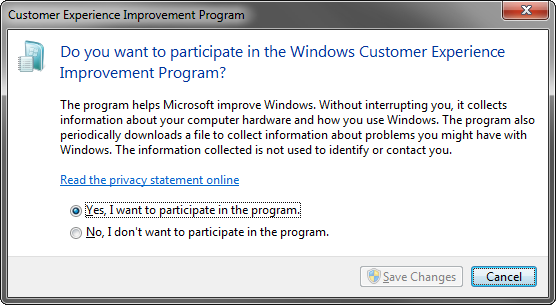 Windows 7 Customer Experience Improvement Program, opt-in form
In this article, I’ll show you a short example on how to create a Microsoft Outlook add-in, adding the TrackToActs’ service option and giving your user the choice to opt-in or out.
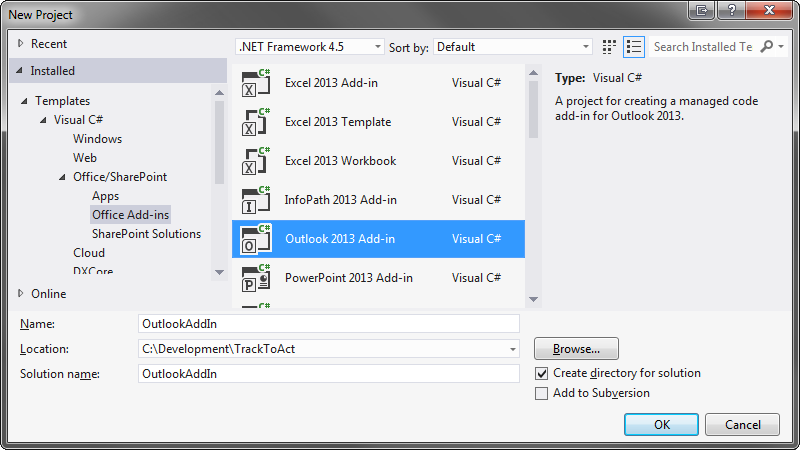
Creating the project
We’ll start by creating a new Outlook 2013 Add-in in Visual Studio 2012.
Designing the UI
We’ll take a use-case from SyncAce, where a user has a choice to synchronize all their contacts or just the current open contact, as an example. To do this we’ll need to add a ribbon to our project.
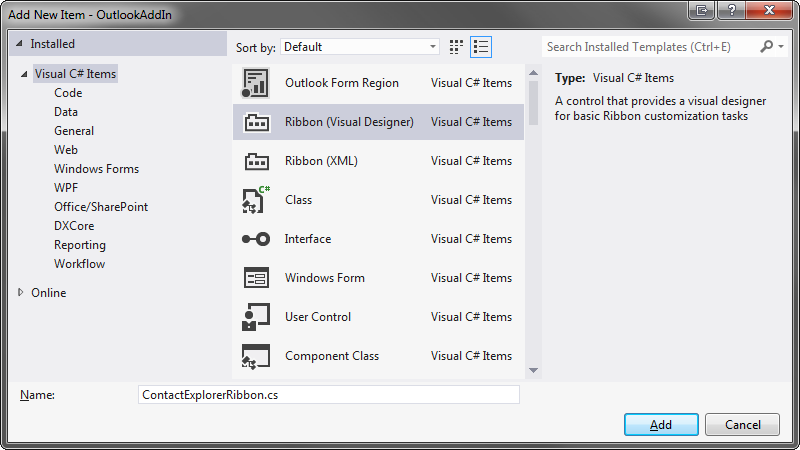
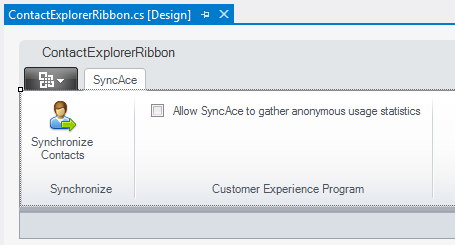
We’ll set the ribbons’ RibbonType property to Microsoft.Outlook.Explorer and add a new “Synchronize Contacts” button. We’ll also add a checkbox with which the user can choose whether they would like to send anonymous usage stats to out TractToAct account.
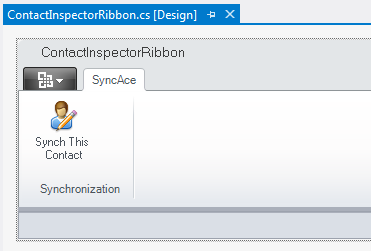
Next, we’ll add another Ribbon, called ContactInspectorRibbon, to our project and set its RibbonType property to Microsoft.Outlook.Contact. We’ll add a “Synch This Contact” button to the ribbon as this ribbon will be used to synchronize the current open contact.
Adding code and tracking logic
With the UI design in place, we can start adding the necessary functionality in code. However, efore we can add the code to save usage data to our TrackToAct account, we need to add a reference to the tracktoact.dll .Net assembly.
We then need to add the necessary code to the Explorer and Inspector ribbon tab buttons:
Explorer Ribbon Tab, Synchronize Contacts button
private void btnSynchContacts_Click(object sender, RibbonControlEventArgs e)
{
    Outlook.Explorer currExplorer = null;
    Outlook.MAPIFolder currFolder = null;
    Outlook.Items contactItems = null;

    try
    {
        if (Properties.Settings.Default.EnableTrackToAct)
            TrackToAct.Service.T2ASdk_InvokeRemoteService("--APPToken—",

             "ContactSynch", "SynchAll");

        currExplorer = Context as Outlook.Explorer;
        currFolder = currExplorer.CurrentFolder;
        if (currFolder.DefaultItemType == Outlook.OlItemType.olContactItem)
        {
            contactItems = currFolder.Items;
            if (contactItems.Count > 0)
            {
                SyncAce.Synchronization.SynchContacts(contactItems);


            }
        }
    }
    finally
    {
        if (contactItems != null)
            Marshal.ReleaseComObject(contactItems);
        if (currFolder != null)
            Marshal.ReleaseComObject(currFolder);
        if (currExplorer != null)
            Marshal.ReleaseComObject(currExplorer);
    }
}
Inspector Ribbon Tab, Synchronize Contact button:
private void btnSynchContact\_Click(object sender, RibbonControlEventArgs e)
{
    Outlook.Inspector currInspector = null;
    Outlook.ContactItem currContact = null;

    try
    {
        if (Properties.Settings.Default.EnableTrackToAct)
            TrackToAct.Service.T2ASdk\_InvokeRemoteService("—APPToken—","ContactSynch", "SynchIndividual");

        currInspector = Context as Outlook.Inspector;
        currContact = currInspector.CurrentItem as Outlook.ContactItem;
        SyncAce.Synchronization.SynchContact(currContact);
    }
    finally
    {
        if (currContact != null)
            Marshal.ReleaseComObject(currContact);
        if (currInspector != null)
            Marshal.ReleaseComObject(currInspector);
    }
}
You’ll notice that I’ve added code to check whether the user ticked the “Allow SyncAce to gather anonymous usage statistics” option before sending usage data to TrackToAct.
Viewing the TrackToAct data
After logging into your TrackToAct account, you can view live sessions of the users currently using your application. You can also assign each individual user a unique name to make identifying them easier.
You might also have noticed the “Send Message” button, and if you’re thinking this is used to send the user a direct message, you’d be right.
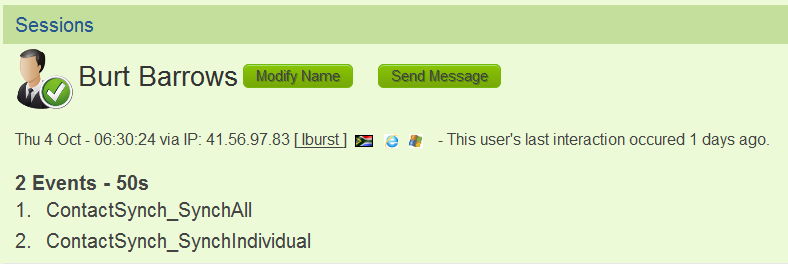
With this functionality you would be able to see what part of your application the user is busy interacting with and you can then send them messages such as. “Looks like you’re only synching individual contacts, did you know you can synchronize all of your contacts at one time?”. This additional functionality is great and brings a whole new interactivity to user support.
With the messaging functionality of TrackToAct you can find customers by which feature they are using and solicit feedback and even provide suggestions and further user instruction on key aspects of your application. This in turn will increase your customers’ satisfaction and convert more users into paying customers.
Interested to explore these new features? Then you would be interested in TrackToAct’s offer of a free Starter plan , which you can start using today.
This was a paid-for article brought to you by TrackToAct. For more information and complete disclosure, please see this blog’s [disclosure policy]