Adding in-app analytics to an Excel VSTO add-in with TrackToAct

Pieter van der Westhuizen, a professional freelance web & mobile developer and founder of Coalition Software.
More than a year ago I’ve announced a tool called the SQL Connector for Excel on this blog. I’ve since removed the SQL Connector bit and only made the Datafier toolkit available as a download. This toolkit gives you a range of Excel formulas to generate random data, which is ideal when you want to populate a test database.
I’ve since decided to re-write the Datafier project and make it a full-fledged Microsoft Excel add-in. The add-in has a number of built-in formulas, but I have no idea which formulas people use the most or how they use them.
With TrackToAct I can do just that, and in this article I’ll show you how.
Creating the project
First, we’ll start a new Excel 2013 Add-in in Visual Studio 2012.
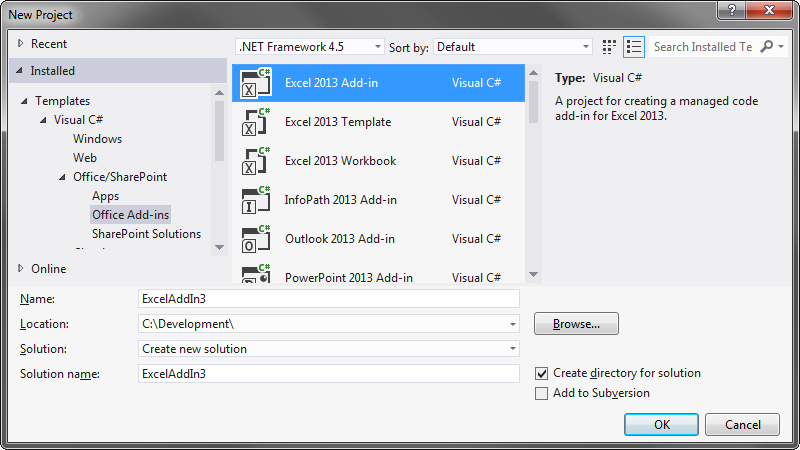
Note: I normally do all my Office Add-ins using Add-in Express. I’ve done this example using VSTO so you can follow the process and to show you that TrackToAct works in any .Net project.
Designing the user interface
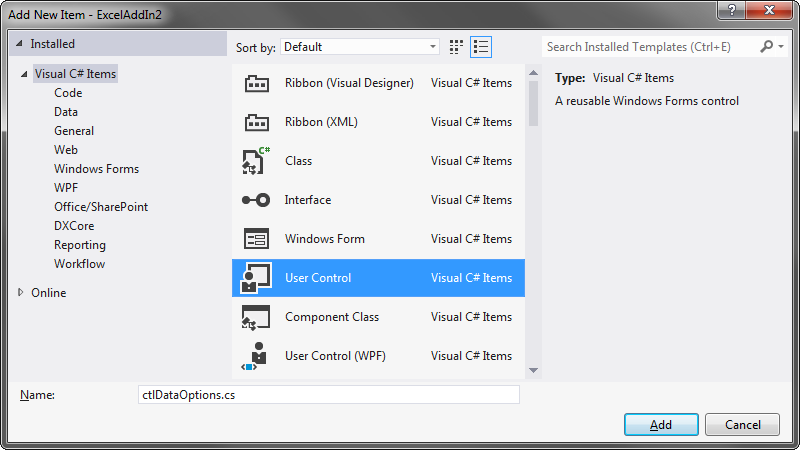
Once the Visual Studio New Project wizard has finished creating your new project, we need to add a new User control to our project. This control will form the basis for our custom Task Pane.
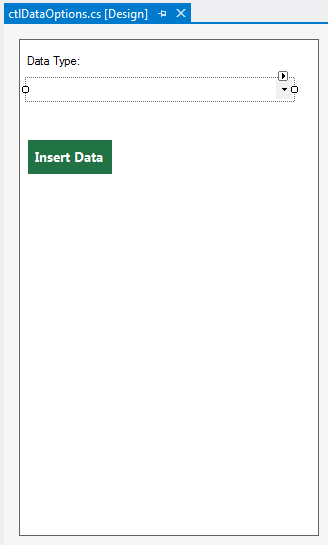
The design for the custom task pane will be pretty much straight forward. We’ll give the user a dropdown-list to choose the type of data s/he would like to generate, for this example the user has a choice of three possible data types:
- First names;
- Last names; and
- Job titles.
We’ll also add a label to show the number of rows and columns the user selected and a big button to insert the data. The final design should look similar to the following image:
Next, we need to add some code to the newly added user control. First, we declare a public property which will contain a reference to the Excel range the user selected:
public Excel.Range SelectedRange { get; set; }
We then create a simple method, called GetData, to return random data based on the data type the user selected:
        private string GetData(string formulaName)
        {
            string formulaResult = string.Empty;
            switch (formulaName)
            {
                case "First names":
                  formulaResult = Person.RandomFirstName(Person.RandomGender(true));
                  break;

                case "Last names":
                  formulaResult = Person.RandomLastName();
                  break;

                case "Job titles":
                    formulaResult = Business.RandomJobTitle();
                    break;

                default:
                    break;
            }
            return formulaResult;
        }
Note: The RandomFirstName, RandomLastName and RandomJobTitle methods are part of a random data library I’ve developed, but it’s not publically available yet.
Adding in-app analytics
Adding in-app analytics is normally not a trivial task when you have to do it yourself. Luckily we can use the TrackToAct .Net library to quickly add in-app analytics. Before you can add the library you need to head over to the TrackToAct website and sign up for a free beta account.
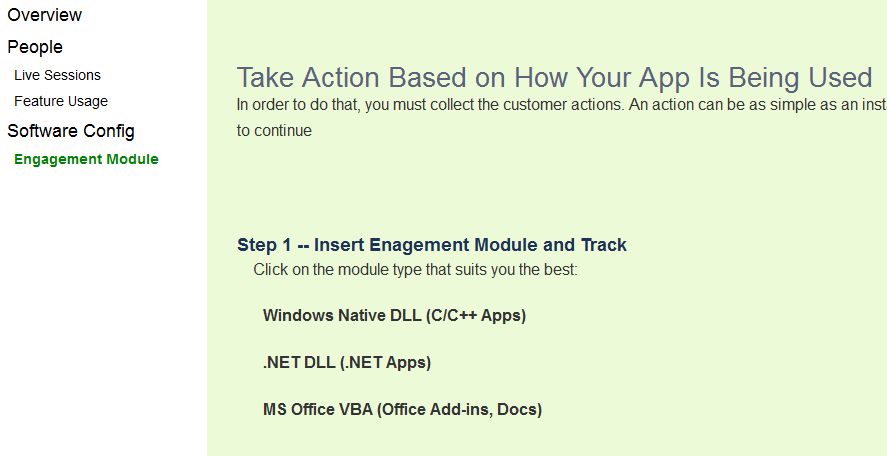
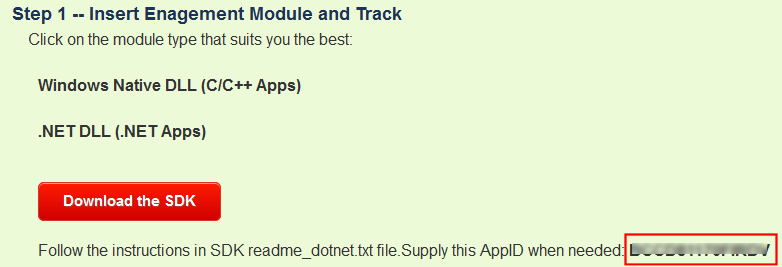
Once registered, you can either download a Native Windows DLL, a .Net library or a solution to add it to your VBA project.
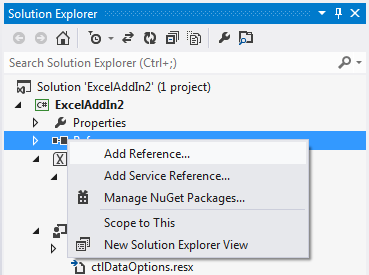
After you’ve downloaded and extracted the .Net DLL, add a reference to the tractotoact.dll assembly to your VSTO project.
Next, we need to add the necessary code to call the TrackToAct service and save the usage data. In the “Insert Data” button’s Click event handler, add the following code:
     private void btnInsert_Click(object sender, EventArgs e)
        {
            int numberofRows = SelectedRange.Cells.Rows.Count;
            foreach (Excel.Range c in SelectedRange.Cells)
            {
                c.Value = GetData(cboDataType.Text);
            }

            TrackToAct.Service.T2ASdk_InvokeRemoteService("--YOURAPPID—",
            cboDataType.Text, numberofRows.ToString());
        }
The T2ASdk _InvokeRemoteService method requires three parameters. The first is your unique AppID which you can find when you click on the .NET DLL to download.
The second and third parameters are a key/value pair in which you can send in any values. Ideally use it to send the event name and any additional information you would like to track.
In this example, I’m sending it the type of data the user is generating as well as the number of rows they’re inserting the data into. By knowing the number of rows, I can determine the amount of data to optimise my add-in for. I can also see, which types of data is the most popular and which is used the least.
Hooking up the final events and code
Before we can see the code in action, we need to add a few more lines of code to the ThisAddin class. The code listing for the class will be:
  public partial class ThisAddIn
    {
        Workbook currWorkbook;
        ctlDataOptions dataOptions;

        private void ThisAddIn_Startup(object sender, System.EventArgs e)
        {
            TrackToAct.Service.T2ASdk_InvokeRemoteService("--YOURAPPID—","Load/Unload", "Startup");
            dataOptions = new ctlDataOptions();
            Microsoft.Office.Tools.CustomTaskPane ctp =
            this.CustomTaskPanes.Add(dataOptions, "Data Generation Options");
            ctp.Visible = true;
            ctp.Width = 300;

            Application.SheetSelectionChange += Application_SheetSelectionChange;
        }

        void Application_SheetSelectionChange(object Sh, Excel.Range Target)
        {
            dataOptions.lblSelection.Text = Target.Rows.Count.ToString() + " row(s) selected";
            dataOptions.SelectedRange = Target;
        }

        private void ThisAddIn_Shutdown(object sender, System.EventArgs e)
        {
            TrackToAct.Service.T2ASdk_InvokeRemoteService("--YOURAPPID—",
            "Load/Unload", "Shutdown");
        }

        #region VSTO generated code

        /// <summary>
        /// Required method for Designer support - do not modify
        /// the contents of this method with the code editor.
        /// </summary>
        private void InternalStartup()
        {
            this.Startup += new System.EventHandler(ThisAddIn_Startup);
            this.Shutdown += new System.EventHandler(ThisAddIn_Shutdown);
        }

        #endregion
    }
You might’ve noticed that I’ve also added code to track when my add-in is loaded and unloaded. I’ve added the appropriate tracking code in the add-in’s Startup and Shutdown events.
Seeing the analytics data
After running the add-in a few times and adding data randomly, you can log into your TrackToAct account and click on the Feature Usage link. From there, you can drill down into the various aspect of your add-in you want to track. For example, I can see that people prefer to generate last names and job titles based on the data below:
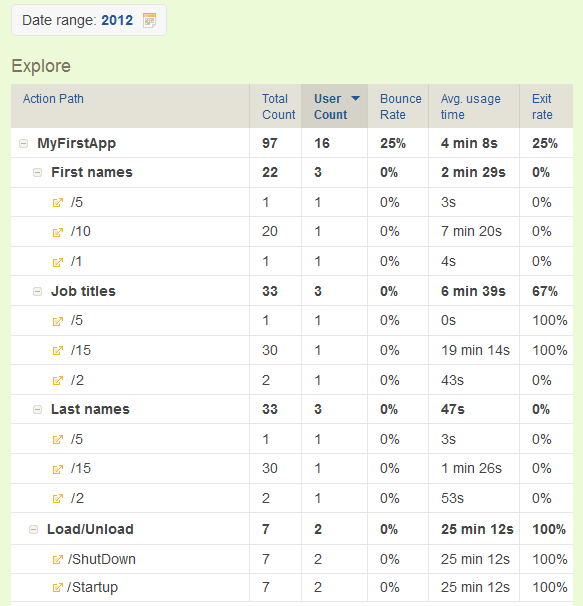
This is just a small portion of what insights TrackToAct can offer you on how people use your application. TrackToAct offers a free Starter plan, with which you can track up to 20,000 actions, allowing you to start using in-app analytics absolutely free of charge.
You can read more on www.TractToAct.com
This was a paid-for article brought to you by TrackToAct.