


Create your own Visual Studio extensions with SideWaffle & TemplateBuilder


The SideWaffle Template pack for Visual Studio is great, but did you know you can also create your own template packs using the TemplateBuilder nuget package?
In this post I’ll guide you through a step-by-step guide on how you can create your own Visual Studio extensions. It’s not that hard, but you do need to keep your wits about you. So without further ado, let’s get started.
Update: SideWaffle has been updated to make it even easier to create your own extensions – without having to export the template first. Take a look at Sayed’s video to see how.
The source project
Before you can build a template, you need a project on which the template is based. For this example, I’ve built an empty ASP.Net MVC template that uses the Foundation Framework. We’ll use this project to create a Visual Studio template that makes it easy to create an ASP.Net MVC site based on the Foundation Framework from Zurb.
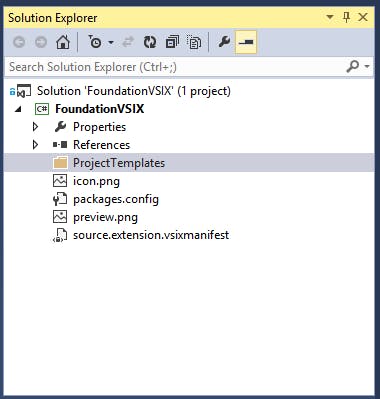
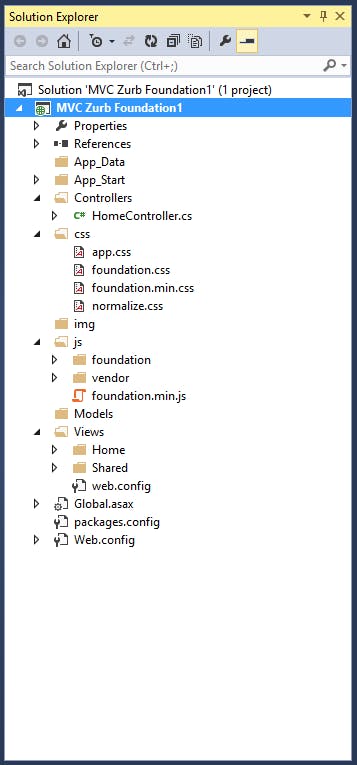
The project layout looks like this in Visual Studio:
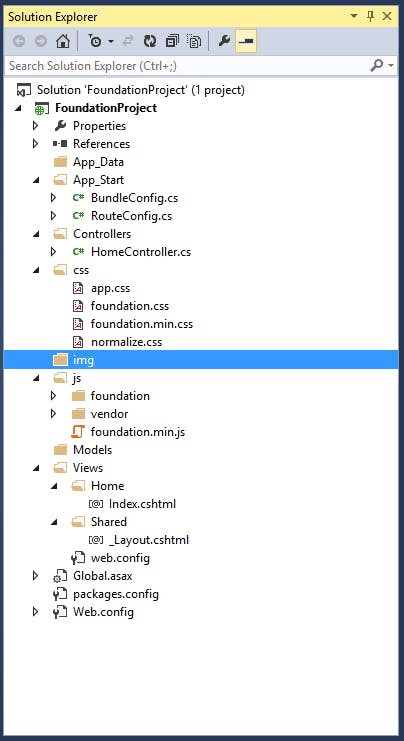
There’s not much to the project, it contains the necessary Foundation assets (CSS and JavaScript files) and we have a Home controller with one view and a Layout file.
Building the template
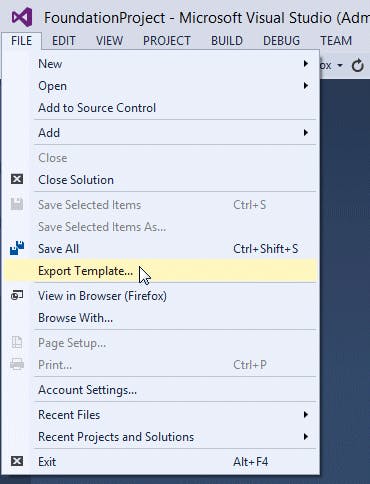
With the project in place, we need to export it as a template. Do this by selecting Export Template from the Visual Studio File menu.
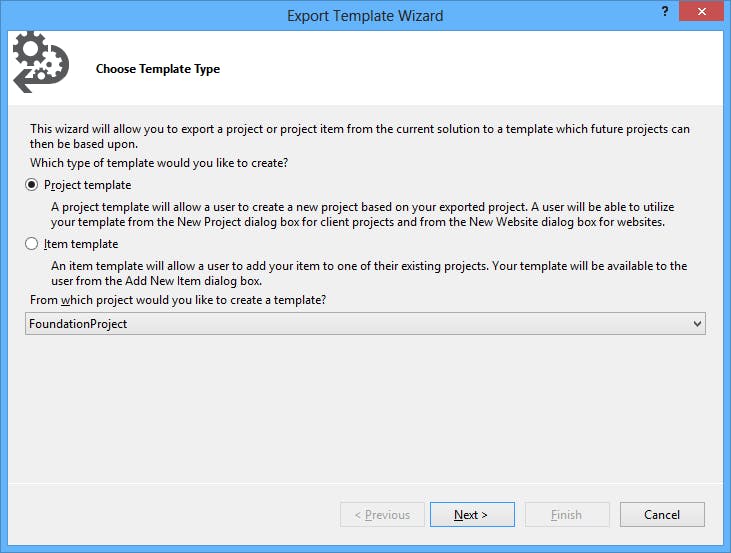
We want to create a Project template, so on the first screen of the “Export Template Wizard”, select the Project Template radio button.
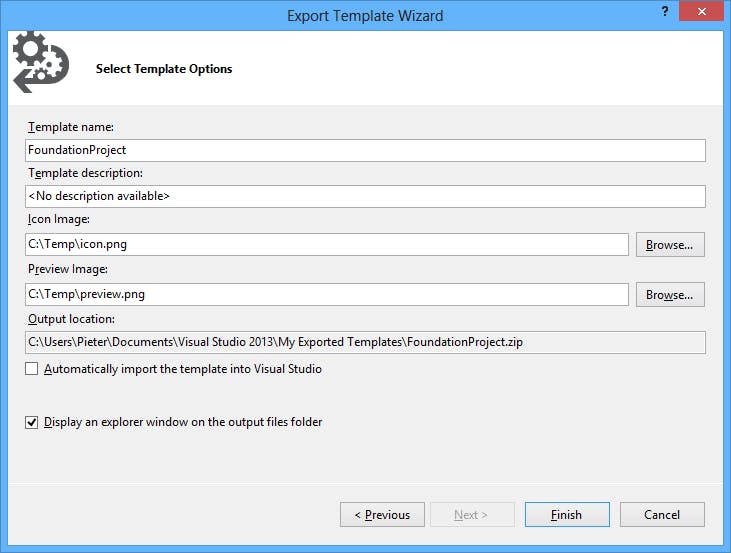
Click Next and on the next screen complete the Template name and Template description fields and select an Icon Image as well as a Preview Image for the template. We do not want to import the template into Visual Studio, so deselect Automatically import the template into Visual Studio. Keep the Display an explorer window on the output files folder checkbox selected.
Click Finish. An Windows Explorer window open the folder where the template was exported to. In my case the location is : C:\Users\Pieter\Documents\Visual Studio 2013\My Exported Templates

Extract the zip file to a location. We’ll get back to the extracted files a bit later.
Creating the VSIX Project
Next, we need to create a new VSIX Project in Visual Studio. You’ll find the project template under Extensibility. If you do not see the project template, you probably do not have the Visual Studio SDK installed. You can download it here.

After the project is created, Visual Studio will display a window, where you can edit certain properties of the VSIX.

Notice that the source.extension.vsixmanifest file contains all the necessary project information and its made up of XML mark-up. Our XML in the file currently looks something like the following (Your GUIDs will differ):
source.extension.vsixmanifest
<?xml version="1.0" encoding="utf-8"?>
<PackageManifest Version="2.0.0" xmlns="http://schemas.microsoft.com/developer/vsx-schema/2011" xmlns:d="http://schemas.microsoft.com/developer/vsx-schema-design/2011">
  <Metadata>
    <Identity Id="FoundationMVC..fb6d38b2-622c-4be2-a2f7-bde181a5fe9b" Version="1.0" Language="en-US" Publisher="Mythical Man Moth" />
    <DisplayName>ASP.Net MVC Foundation Site</DisplayName>
    <Description xml:space="preserve">ASP.Net MVC Site with the Zurb Foundation Framework</Description>
    <Icon>icon.png</Icon>
    <PreviewImage>preview.png</PreviewImage>
  </Metadata>
   <Installation>
     <InstallationTarget Id="Microsoft.VisualStudio.Pro" Version="[12.0]" />
   </Installation>
   <Dependencies>
     <Dependency Id="Microsoft.Framework.NDP" DisplayName="Microsoft .NET Framework" d:Source="Manual" Version="[4.5,)" />
   </Dependencies>
 </PackageManifest>
Adding the TemplateBuilder Nuget Package
The next step we need to take is to add the TemplateBuilder Nuget package to our project. To do this open the Package Manager Console and enter the following command, followed by enter:
Install-Package TemplateBuilder –Pre
If all goes well, you should see the following output in the Package Manager Console:
Package Manager Console
PM> Install-Package TemplateBuilder -Pre
Installing 'TemplateBuilder 1.0.3.45-beta'.
Successfully installed 'TemplateBuilder 1.0.3.45-beta'.
Adding 'TemplateBuilder 1.0.3.45-beta' to FoundationVSIX.
Successfully added 'TemplateBuilder 1.0.3.45-beta' to FoundationVSIX.
*********** Adding template-builder
Adding item template asset tag to .vsixmanifest file C:DevelopmentFoundationExtensionFoundationVSIXFoundationVSIXsource.extension.vsixmanifest
Adding project template asset tag to .vsixmanifest file C:DevelopmentFoundationExtensionFoundationVSIXFoundationVSIXsource.extension.vsixmanifest
TemplateBuilder has been installed into project [C:DevelopmentFoundationExtensionFoundationVSIXFoundationVSIXFoundationVSIX.csproj]
- For more info how to enable TemplateBuilder on build servers see sedodream.com/2013/06/06/HowToSimplifyShipp..
- PM>
Open the source.extension.vsixmanifest file and you’ll notice that two items has been added to the Assets element. This tells TemplateBuilder where it can find the Item and Project templates for the VSIX package. The full code for the source.extension.vsixmanifest file now looks like (New items are bolded):
source.extension.vsixmanifest
<?xml version="1.0" encoding="utf-8"?>
<PackageManifest Version="2.0.0" xmlns="http://schemas.microsoft.com/developer/vsx-schema/2011" xmlns:d="http://schemas.microsoft.com/developer/vsx-schema-design/2011">
  <Metadata>
    <Identity Id="FoundationMVC..fb6d38b2-622c-4be2-a2f7-bde181a5fe9b" Version="1.0" Language="en-US" Publisher="Mythical Man Moth" />
    <DisplayName>ASP.Net MVC Foundation Site</DisplayName>
    <Description xml:space="preserve">ASP.Net MVC Site with the Zurb Foundation Framework</Description>
    <Icon>icon.png</Icon>
    <PreviewImage>preview.png</PreviewImage>
  </Metadata>
   <Installation>
     <InstallationTarget Id="Microsoft.VisualStudio.Pro" Version="[12.0]" />
   </Installation>
   <Dependencies>
     <Dependency Id="Microsoft.Framework.NDP" DisplayName="Microsoft .NET Framework" d:Source="Manual" Version="[4.5,)" />
   </Dependencies>
   <Assets>
     <Asset Type="Microsoft.VisualStudio.ItemTemplate" Path="OutputItemTemplates" />
     <Asset Type="Microsoft.VisualStudio.ProjectTemplate" Path="OutputProjectTemplates" />
   </Assets>
 </PackageManifest>
Adding the template source files
Before we can add the template files we extracted earlier. We need to add a few more things to our project. First, create a new folder called ProjectTemplates
Next, add new SideWaffle Project Template files to the ProjectTemplates folder. If you do not see the item template under Extensibility > SideWaffle it means you do no have SideWaffle installed.
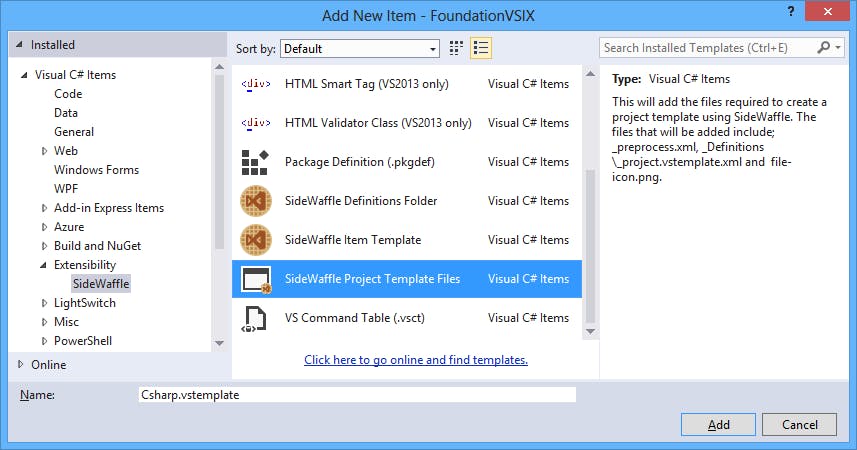
The item template will add the following to the ProjectTemplates folder:
- _Definitions folder
- _project.vstemplate.xml file inside the _Definitions folder. Rename this file to Csharp.vstemplate
- _preprocess.xml
- sw-file.icon.png
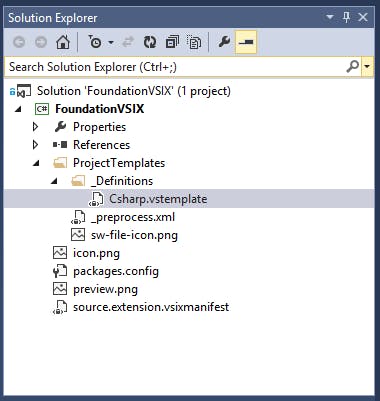
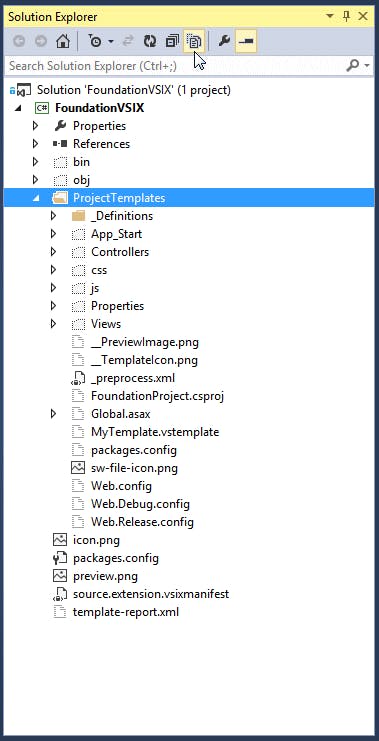
The Solution Explorer should look like the following:
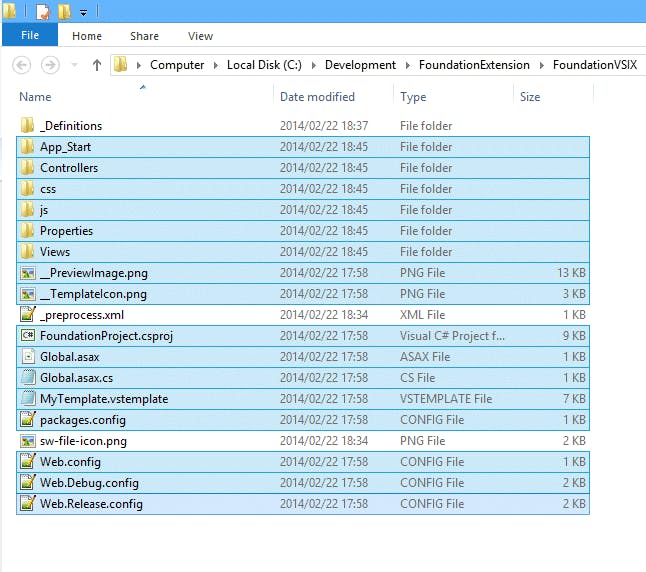
Next, navigate to the folder to which you’ve extracted the exported template we’ve created earlier and copy all the files.
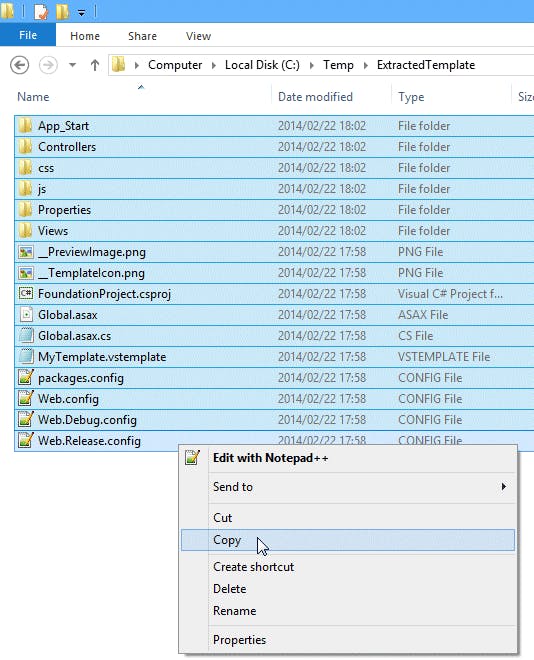
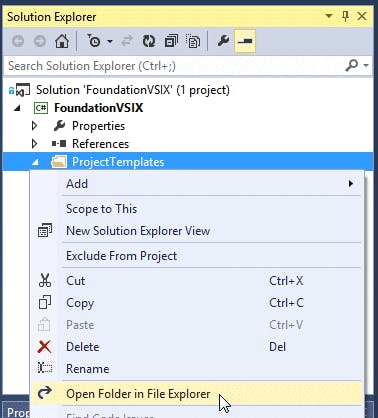
Switch back to Visual Studio and right-click on the ProjectTemplates folder and select Open folder in File Explorer
Paste the copied files in the folder
When switching back to Visual Studio, you won’t see the project files, unless you click the Show All Files button on the Solution Explorer toolbar. This is fine, you do not need to include the files inside the project. You can include the files, it will make no difference.
Next, open the MyTemplate.vstemplate file (This will be in the exported project template folder). And copy the TemplateContent element and all its child elements. Open the Csharp.vstemplate file and replace its TemplateContent element with the one you’ve just copied. The full mark-up for the Csharp.vstemplate file follows:
Csharp.vstemplate
<VSTemplate Version="3.0.0" xmlns="http://schemas.microsoft.com/developer/vstemplate/2005" Type="Project">
  <TemplateData>
    <Name>MVC Zurb Foundation</Name>
    <Description>Zurb Foundation MVC Project</Description>
    <ProjectType>CSharp</ProjectType>
    <ProjectSubType></ProjectSubType>
    <SortOrder>1000</SortOrder>
    <CreateNewFolder>true</CreateNewFolder>
    <ProvideDefaultName>true</ProvideDefaultName>
     <LocationField>Enabled</LocationField>
     <EnableLocationBrowseButton>true</EnableLocationBrowseButton>
     <Icon>sw-file-icon.png</Icon>

     <!– Indicates how many parent folders this item template should appear in –>
     <NumberOfParentCategoriesToRollUp>1</NumberOfParentCategoriesToRollUp>
   </TemplateData>
   <TemplateContent>
     <Project TargetFileName="FoundationProject.csproj" File="FoundationProject.csproj" ReplaceParameters="true">
       <Folder Name="App_Data" TargetFolderName="App_Data" />
       <Folder Name="App_Start" TargetFolderName="App_Start">
         <ProjectItem ReplaceParameters="true" TargetFileName="BundleConfig.cs">BundleConfig.cs</ProjectItem>
         <ProjectItem ReplaceParameters="true" TargetFileName="RouteConfig.cs">RouteConfig.cs</ProjectItem>
       </Folder>
       <Folder Name="Controllers" TargetFolderName="Controllers">
         <ProjectItem ReplaceParameters="true" TargetFileName="HomeController.cs">HomeController.cs</ProjectItem>
       </Folder>
       <Folder Name="css" TargetFolderName="css">
         <ProjectItem ReplaceParameters="true" TargetFileName="app.css">app.css</ProjectItem>
         <ProjectItem ReplaceParameters="true" TargetFileName="foundation.css">foundation.css</ProjectItem>
         <ProjectItem ReplaceParameters="true" TargetFileName="foundation.min.css">foundation.min.css</ProjectItem>
         <ProjectItem ReplaceParameters="true" TargetFileName="normalize.css">normalize.css</ProjectItem>
       </Folder>
       <ProjectItem ReplaceParameters="true" TargetFileName="Global.asax">Global.asax</ProjectItem>
       <ProjectItem ReplaceParameters="true" TargetFileName="Global.asax.cs">Global.asax.cs</ProjectItem>
       <Folder Name="img" TargetFolderName="img" />
       <Folder Name="js" TargetFolderName="js">
         <Folder Name="foundation" TargetFolderName="foundation">
           <ProjectItem ReplaceParameters="true" TargetFileName="foundation.abide.js">foundation.abide.js</ProjectItem>
           <ProjectItem ReplaceParameters="true" TargetFileName="foundation.accordion.js">foundation.accordion.js</ProjectItem>
           <ProjectItem ReplaceParameters="true" TargetFileName="foundation.alert.js">foundation.alert.js</ProjectItem>
           <ProjectItem ReplaceParameters="true" TargetFileName="foundation.clearing.js">foundation.clearing.js</ProjectItem>
           <ProjectItem ReplaceParameters="true" TargetFileName="foundation.dropdown.js">foundation.dropdown.js</ProjectItem>
           <ProjectItem ReplaceParameters="true" TargetFileName="foundation.interchange.js">foundation.interchange.js</ProjectItem>
           <ProjectItem ReplaceParameters="true" TargetFileName="foundation.joyride.js">foundation.joyride.js</ProjectItem>
           <ProjectItem ReplaceParameters="true" TargetFileName="foundation.js">foundation.js</ProjectItem>
           <ProjectItem ReplaceParameters="true" TargetFileName="foundation.magellan.js">foundation.magellan.js</ProjectItem>
           <ProjectItem ReplaceParameters="true" TargetFileName="foundation.offcanvas.js">foundation.offcanvas.js</ProjectItem>
           <ProjectItem ReplaceParameters="true" TargetFileName="foundation.orbit.js">foundation.orbit.js</ProjectItem>
           <ProjectItem ReplaceParameters="true" TargetFileName="foundation.reveal.js">foundation.reveal.js</ProjectItem>
           <ProjectItem ReplaceParameters="true" TargetFileName="foundation.tab.js">foundation.tab.js</ProjectItem>
           <ProjectItem ReplaceParameters="true" TargetFileName="foundation.tooltip.js">foundation.tooltip.js</ProjectItem>
           <ProjectItem ReplaceParameters="true" TargetFileName="foundation.topbar.js">foundation.topbar.js</ProjectItem>
         </Folder>
         <ProjectItem ReplaceParameters="true" TargetFileName="foundation.min.js">foundation.min.js</ProjectItem>
         <Folder Name="vendor" TargetFolderName="vendor">
           <ProjectItem ReplaceParameters="true" TargetFileName="custom.modernizr.js">custom.modernizr.js</ProjectItem>
           <ProjectItem ReplaceParameters="true" TargetFileName="fastclick.js">fastclick.js</ProjectItem>
           <ProjectItem ReplaceParameters="true" TargetFileName="jquery.autocomplete.js">jquery.autocomplete.js</ProjectItem>
           <ProjectItem ReplaceParameters="true" TargetFileName="jquery.cookie.js">jquery.cookie.js</ProjectItem>
           <ProjectItem ReplaceParameters="true" TargetFileName="jquery.js">jquery.js</ProjectItem>
           <ProjectItem ReplaceParameters="true" TargetFileName="modernizr.js">modernizr.js</ProjectItem>
           <ProjectItem ReplaceParameters="true" TargetFileName="placeholder.js">placeholder.js</ProjectItem>
         </Folder>
       </Folder>
       <Folder Name="Models" TargetFolderName="Models" />
       <ProjectItem ReplaceParameters="true" TargetFileName="packages.config">packages.config</ProjectItem>
       <Folder Name="Properties" TargetFolderName="Properties">
         <ProjectItem ReplaceParameters="true" TargetFileName="AssemblyInfo.cs">AssemblyInfo.cs</ProjectItem>
       </Folder>
       <Folder Name="Views" TargetFolderName="Views">
         <Folder Name="Home" TargetFolderName="Home">
           <ProjectItem ReplaceParameters="true" TargetFileName="Index.cshtml">Index.cshtml</ProjectItem>
         </Folder>
         <Folder Name="Shared" TargetFolderName="Shared">
           <ProjectItem ReplaceParameters="true" TargetFileName="_Layout.cshtml">_Layout.cshtml</ProjectItem>
         </Folder>
         <ProjectItem ReplaceParameters="true" TargetFileName="web.config">web.config</ProjectItem>
       </Folder>
       <ProjectItem ReplaceParameters="true" TargetFileName="Web.config">Web.config</ProjectItem>
       <ProjectItem ReplaceParameters="true" TargetFileName="Web.Debug.config">Web.Debug.config</ProjectItem>
       <ProjectItem ReplaceParameters="true" TargetFileName="Web.Release.config">Web.Release.config</ProjectItem>
     </Project>
   </TemplateContent>
 </VSTemplate>
NB: Delete the MyTemplate.vstemplate file after you’ve copied the element – this will save you a headache later.
That takes care of the .vstemplate file. The last step we need to take is to edit the _preprocess.xml file. All we need to change in it is the TemplateInfo elements’ Path attribute – this is used to specify where the template will show up in Visual Studio. We also need to add a key to replace the project template with a safe project name. The xml for the _preprocess.xml file looks like:
_preprocess.xml
<?xml version="1.0" encoding="utf-8" ?>
<Preprocess>
  <TemplateInfo Path="CSharpMythical Man Moth"/>
  <Replacements Include="*.*" Exclude="*.vstemplate;*.csproj;*.fsproj;*.vbproj;*.jpg;*.png;*.ico;_preprocess.xml">
    <add key="FoundationProject" value="$safeprojectname$"/>
  </Replacements>
</Preprocess>
Testing the extension
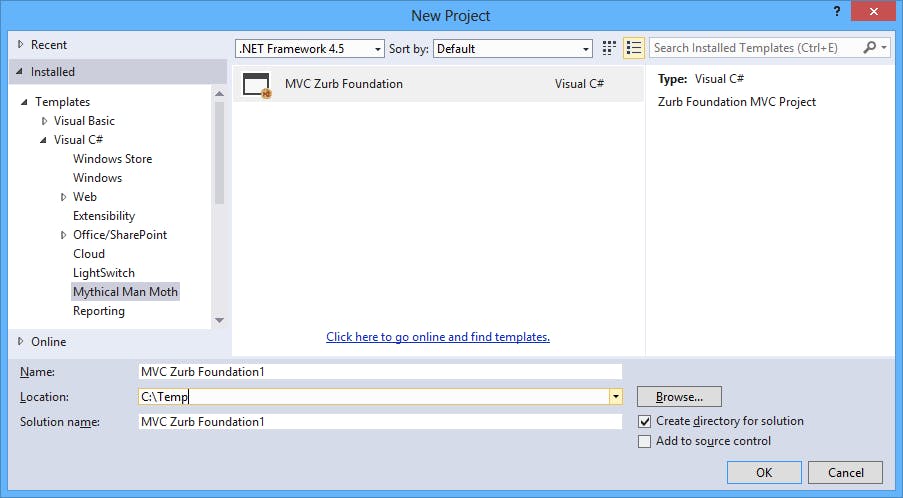
Build and run the project. This will start an experimental instance of Visual Studio. Select File > New Project. You should see a new entry under Visual C# entitled Mythical Man Moth and in this section, you should see our project template:
When you create the project. It should create a new ASP.Net MVC project with all the necessary assets to build a Zurb Foundation website.
One thing you’ll notice is that you’ll have to restore the Nuget packages for the project in order for it to build successfully. I’ll explain how you can include Nuget packages in your Visual Studio extensions in a future post. I’ll also show you how you can add your own wizard UI’s and how to create item templates.
That’s it for this post. Thank you for reading. Until next time, keep coding!